Building boxes above your kitchen cabinets is a smart way to add more storage and style to your kitchen. This project is not just about filling empty space—it can help you keep things organized, reduce dust, and make your kitchen look taller and more finished.
Many people ignore the area above their cabinets, but with some planning and simple tools, you can turn it into a useful and beautiful part of your kitchen.
You might be worried that this project is too advanced if you’re not a builder or designer. The good news is, you don’t need special skills to succeed. With the right steps and a clear plan, anyone can build sturdy, attractive boxes above kitchen cabinets.
This guide will walk you through everything, from design ideas to installation tips and finishing touches. Whether your kitchen is big or small, old or new, you’ll find practical advice and examples here.
Let’s break down exactly how to build boxes above kitchen cabinets, what materials to use, and how to make them look like they’ve always been part of your kitchen. Along the way, you’ll get tips that beginners often miss, common mistakes to avoid, and even ideas for using your new storage space wisely.
Why Build Boxes Above Kitchen Cabinets?
There are several reasons why homeowners choose to build boxes above their kitchen cabinets. Understanding these benefits will help you decide if this project is right for your kitchen.
- Extra Storage: The space above your cabinets is often wasted. Adding boxes lets you store less-used items, like holiday dishes or small appliances.
- Cleaner Look: Boxes close off the gap that collects dust and grease, making cleaning easier and your kitchen look tidier.
- Custom Style: You can choose the look—modern, classic, or farmhouse. The boxes can match your cabinets or contrast for a unique effect.
- Increased Value: A finished, built-in look often adds value to your home, especially if your kitchen looks more custom and organized.
- Hides Problems: If your ceiling or the tops of your cabinets are uneven, boxes can cover these flaws.
Many people do not realize that adding boxes can also improve lighting and acoustics in the kitchen. The closed space can help hide wires for under-cabinet lighting or even provide a spot for speakers.
Planning Your Project
Good planning is key. Rushing in without measuring or choosing the right materials can lead to frustration and wasted money. Here’s what to consider before you start building.
Measure Your Space
Start by measuring the height from the top of your cabinets to the ceiling and the depth from the front of your cabinets to the wall. Not all kitchens have the same gap, so get precise numbers.
- Use a tape measure for accuracy.
- Check if the ceiling is level—the gap might be smaller on one side.
- Write down the measurements for every section if your cabinets are not all the same height.
Decide On Box Height And Depth
You don’t have to build boxes that fill the entire gap. Think about:
- Full height: The boxes go all the way to the ceiling.
- Partial height: Leave a small gap at the top for a lighter look.
- Flush with cabinet fronts: The box is even with the cabinet doors.
- Set back: The box is a few inches behind the cabinet face for a shadow line.
Choose Box Function
Will your boxes be just for looks, or do you want to open and use them? You have several options:
- Fixed boxes (no doors): For a smooth, closed look.
- Accessible boxes (with doors or lift-up panels): For extra storage.
- Display boxes (with glass fronts or open shelves): For décor items.
Many beginners forget to consider access. If your ceiling is very high, opening these boxes might be hard without a step stool.
Pick Your Style
The style should match or complement your existing cabinets. Some common choices are:
- Simple flat panels for a modern feel
- Crown molding for a classic, traditional look
- Beadboard or shiplap for farmhouse style
You can paint or stain the boxes to match your cabinets or choose a bold color for contrast.
Materials Needed
The main materials for building boxes above kitchen cabinets are:
- Plywood or MDF: For the box structure
- Wood trim or molding: For decorative fronts
- Paint or stain
- Screws, nails, and wood glue
- Hinges (if using doors)
- Finishing materials: Caulk, wood filler
Choosing between plywood and MDF is important. Plywood is stronger and handles humidity better, but MDF is smoother and often cheaper.
Budget And Timeline
Costs can vary widely depending on the size and finish. For a standard kitchen (10-15 feet of cabinets), expect to spend $150–$500 on materials. Hiring a pro can cost much more.
Most DIYers can finish this project in a weekend, but allow extra time for painting and drying.
Gathering Tools And Materials
Having the right tools makes the job easier and safer. Here’s what you’ll need before starting.
Basic Tools
- Measuring tape and pencil
- Level
- Saw (circular saw or miter saw)
- Drill and drill bits
- Hammer or nail gun
- Clamps
Extra Supplies
- Sandpaper
- Painter’s tape
- Drop cloths (for mess)
- Safety glasses and dust mask
If you plan to add doors, you’ll also need hinges and a screwdriver. For painted finishes, invest in a good quality brush or roller.
Many beginners skip clamps, but they are essential for holding pieces together while glue dries. Not using clamps can lead to weak joints.
Designing Your Boxes
Before you cut any wood, sketch your plan. You don’t need to be an artist—simple drawings with measurements will help you avoid mistakes.
Sample Design Sketch
- Draw your kitchen wall with cabinets and the gap above.
- Show where the boxes will go.
- Mark the height, depth, and width of each box.
- Note where seams or joints will be.
Example Dimensions
If your cabinets are 12 inches from the ceiling and 12 inches deep, you might build boxes 12 inches tall and 12 inches deep for a flush look.
But, if you want a shadow line, make the box 10 inches deep. If you want a stepped effect, use different depths.
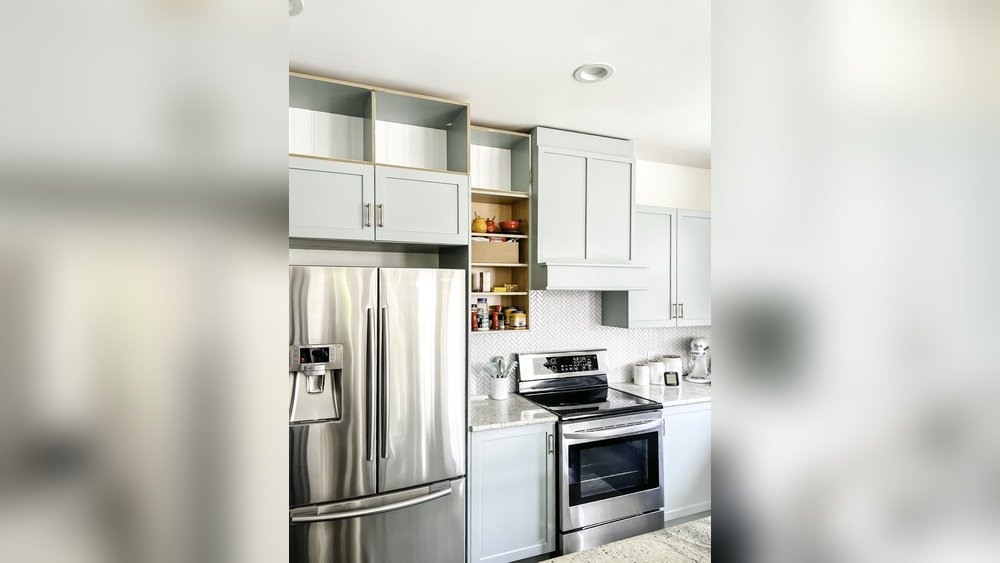
Table: Typical Box Dimensions For Different Cabinet Styles
| Cabinet Style | Typical Gap Height (inches) | Recommended Box Height (inches) | Box Depth (inches) |
|---|---|---|---|
| Standard 30″ Cabinets | 12–18 | 12–18 | 12 |
| Tall 42″ Cabinets | 6–10 | 6–10 | 12 |
| Custom Cabinets | Varies | Gap height minus 1″ | Cabinet depth or less |
Credit: simplybeautifulbyangela.com
Cutting And Building The Boxes
Once your plan is clear, it’s time to start building. Work slowly and check your measurements as you go.
Cutting The Panels
- Mark each piece with a pencil before cutting.
- Use a saw that makes straight, clean cuts.
- For plywood, use a fine-tooth blade to avoid splinters.
Each box needs a front, top, bottom, and two sides. The back is usually not visible, but you can add a thin panel if your boxes will be open or used for storage.
Assembling The Box
- Lay out the pieces on a flat surface.
- Glue and clamp the sides to the top and bottom.
- Use screws or nails for extra strength.
- Attach the front panel or frame.
If you are adding doors, do not install them until after painting or staining.
Test Fit
Before painting or finishing, place the box above your cabinets to check the fit. Adjust if necessary.
Many beginners forget to test fit, which can lead to boxes that are too tight or uneven.
Attaching The Boxes Above Cabinets
This step matters for safety and appearance. There are several ways to install the boxes, depending on your cabinets and walls.
Method 1: Resting On Cabinet Tops
If your cabinets are strong and level, you can set the boxes directly on top.
- Run a bead of wood glue along the cabinet top.
- Set the box in place and check for level.
- Secure with a few screws from inside the cabinet up into the box (be careful not to go through the top).
Method 2: Wall-mounted Cleats
For more support, use wood cleats attached to the wall.
- Screw a 1×2 or 2×2 strip into wall studs above the cabinets.
- Set the back edge of the box on the cleat.
- Screw through the front of the box into the cabinet top for extra security.
Method 3: Direct To Ceiling
If the box goes all the way to the ceiling, you can also screw the top of the box into ceiling joists.
- Use a stud finder to locate joists.
- Pre-drill and use long screws.
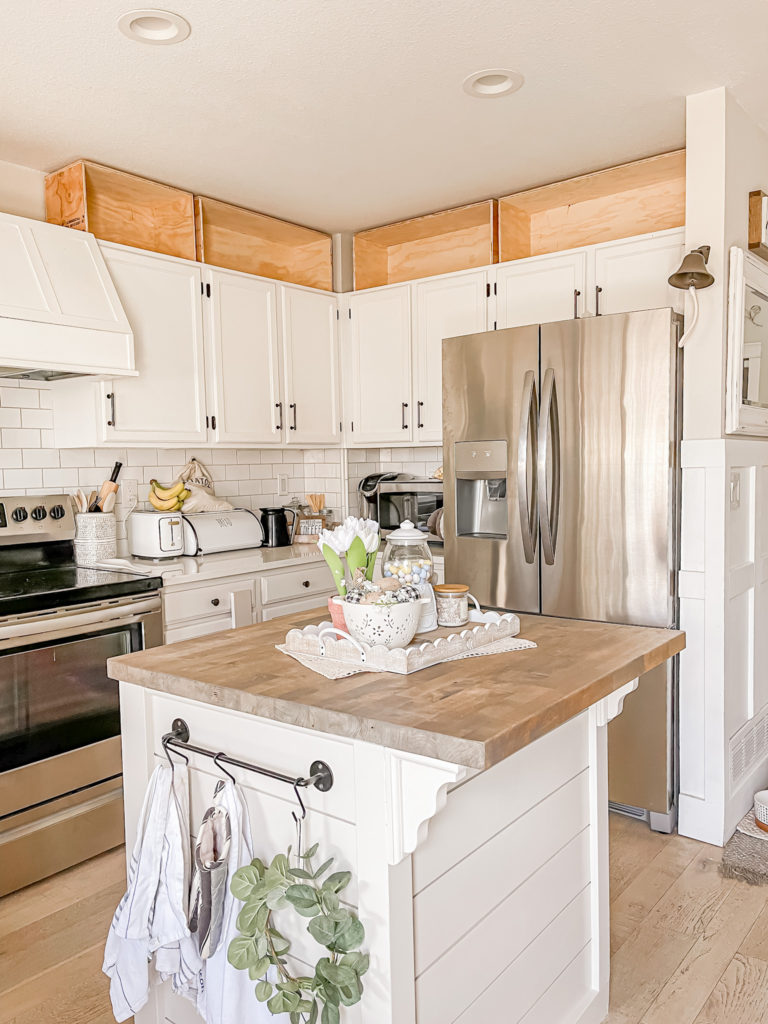
Table: Installation Methods Compared
| Installation Method | Strength | Best For | Difficulty |
|---|---|---|---|
| Resting on Cabinets | Medium | Even, strong cabinets | Easy |
| Wall-Mounted Cleats | High | Uneven cabinets, heavy boxes | Medium |
| Ceiling Attachment | Very High | Full height boxes | Hard |
Using cleats is often the safest for older homes where cabinets may not be perfectly secure.
Credit: homewithmarieza.com
Finishing And Painting
Finishing makes your boxes look professional and helps them last. Take your time with this step for the best result.
Prepping The Surface
- Sand all edges smooth.
- Fill any gaps or screw holes with wood filler.
- Wipe away dust with a damp cloth.
Painting Or Staining
- Use a primer if painting raw wood or MDF.
- Apply 2-3 coats of paint or stain, letting each coat dry fully.
- For a super smooth finish, lightly sand between coats.
Adding Trim Or Molding
- Cut molding to fit the front and top of the box.
- Attach with wood glue and small nails.
- Caulk any seams for a seamless look.
If your kitchen already has crown molding, match the new molding for a built-in effect. If not, you can add a simple profile for a modern look.
Table: Pros And Cons Of Paint Vs Stain
| Finish Type | Pros | Cons |
|---|---|---|
| Paint | Custom color, hides wood grain, easy to touch up | Shows chips, more prep needed |
| Stain | Natural wood look, durable, easier to match existing wood | Limited colors, needs good quality wood |
Most people choose paint for MDF and stain for plywood or solid wood.
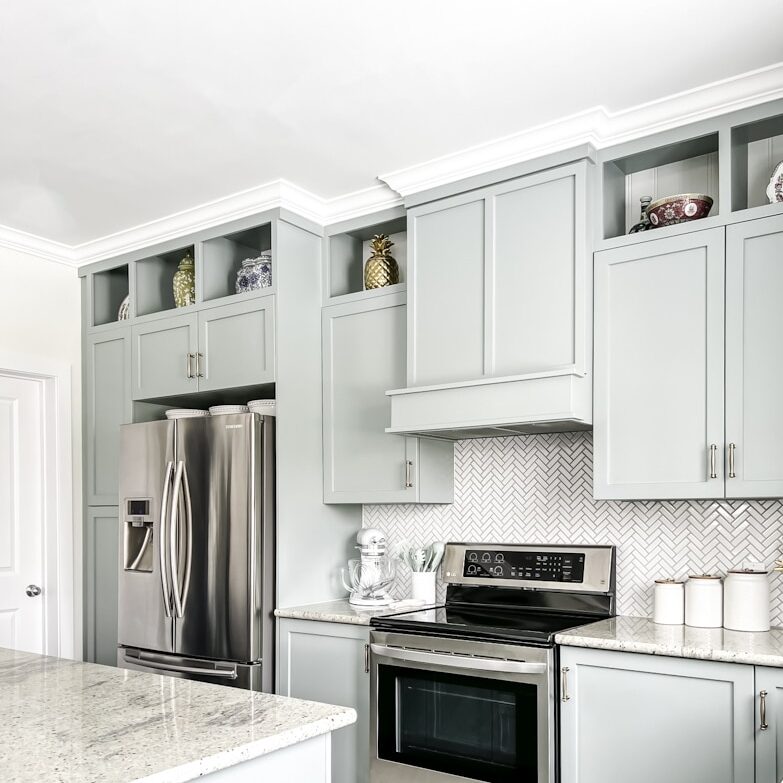
Adding Doors Or Decorative Panels
For boxes you want to access, add doors. For a more decorative look, consider glass or lattice panels.
Installing Doors
- Buy pre-made doors or make simple flat panels.
- Attach with small hinges.
- Add magnetic catches to keep doors closed.
If you want a seamless look, paint the doors and boxes together.
Using Glass Or Mesh Panels
- Buy glass inserts or metal mesh panels.
- Mount in a wood frame for strength.
- This is perfect for displaying dishes or collectibles.
A common mistake is skipping handles or knobs on tall boxes. Even small knobs make opening the doors much easier.

Credit: www.thriftydecorchick.com
Tips For A Professional Look
Here are extra tips that beginners often miss but make a big difference:
- Check for Level: Even small differences are visible at ceiling height. Use a long level for accuracy.
- Hide Seams: Use wood filler and sand well before painting.
- Lighting: Consider adding LED strip lights above or below the boxes for a soft glow.
- Ventilation: If there’s a vent or pipe above your cabinets, build the box around it or leave a gap for air flow.
- Access: If you use the boxes for storage, store only light or rarely needed items up high.
Creative Ideas For Above-cabinet Boxes
Don’t be afraid to customize your boxes. Here are some creative uses and designs:
- Display Shelves: Leave some boxes open and light them for decorative pieces.
- Hidden Storage: Add push-to-open doors for a clean look.
- Seasonal Swaps: Store seasonal decorations and rotate them easily.
- Pet Food or Supplies: Keep pet items out of the way but easy to reach.
- Recipe Archives: Store cookbooks or family recipe boxes up high.
You can also mix box sizes for a more dynamic look, or use mirrored panels to reflect light in a dark kitchen.
Common Mistakes To Avoid
Even handy people can make mistakes on this project. Here’s what to watch out for:
- Poor measuring: Double-check all measurements before cutting.
- Skipping prep: Sand and prime for a smooth finish.
- Too heavy: Don’t overload boxes—especially if using MDF, which can sag.
- Ignoring ceiling slope: Many ceilings are not perfectly level. Adjust box height to fit.
- Bad attachment: Secure boxes to studs or cabinets for safety.
One insight many miss: If your kitchen ceiling is not flat, try building boxes a little shorter and use flexible molding to close any small gaps at the top.
Using Your New Storage Space
Once your boxes are in place, it’s time to use them. Think carefully about what goes up high.
- Store items you don’t need every day, like holiday dishes or big serving platters.
- Use bins or baskets inside the boxes for easy access.
- Label the boxes if you have several.
A good rule: If you need a ladder to reach it, don’t store anything heavy or breakable up there.
When To Call A Professional
Most homeowners can handle this project, but consider hiring help if:
- Your cabinets are very old or loose.
- You want a super custom look with special materials.
- There are pipes, vents, or electrical wires above your cabinets.
- You’re not comfortable with saws or power tools.
A pro can help with design and installation but will cost more.
For more details on cabinet construction and woodworking basics, you can check resources like This Old House.
Frequently Asked Questions
What Are The Benefits Of Building Boxes Above Kitchen Cabinets?
Building boxes above kitchen cabinets adds storage, hides dust and grease, and makes your kitchen look finished. It can also cover flaws or uneven ceilings and add value to your home.
What Materials Are Best For Building The Boxes?
Plywood is strong and resists moisture, while MDF is smooth and less expensive. Choose based on your budget, finish preference, and kitchen humidity.
Can I Add Boxes Above Cabinets In A Rental Apartment?
Check your lease first. Some renters use removable boxes or secure the boxes with only a few screws for easy removal. Always get permission before making permanent changes.
How Do I Match The New Boxes To My Cabinets?
Use similar paint, stain, or molding profiles as your cabinets. You can also take a cabinet door to a paint store to match the color exactly.
How Do I Clean And Maintain Above-cabinet Boxes?
Wipe down the boxes with a damp cloth. If they’re painted, avoid harsh cleaners. Clean the tops of the doors or open shelves every few months to remove dust.
Building boxes above kitchen cabinets is one of the best ways to maximize your kitchen’s potential. With careful planning and a little work, you’ll enjoy a kitchen that’s both beautiful and more useful—no matter its size or style.