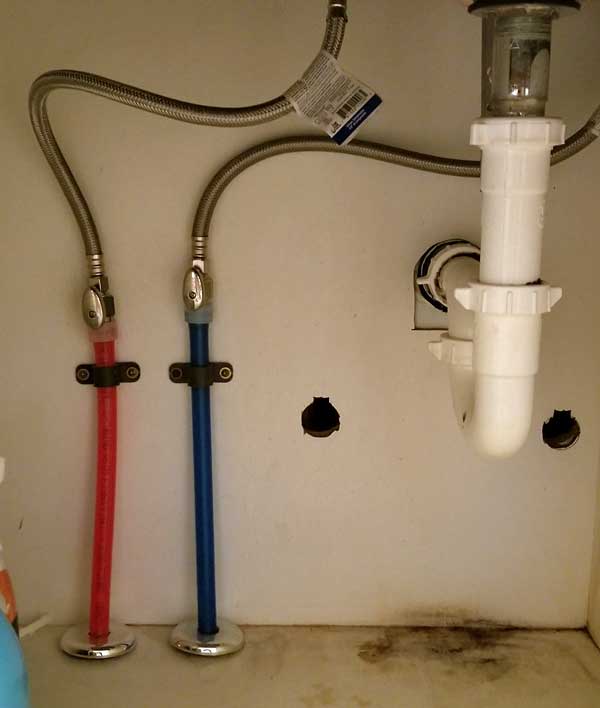
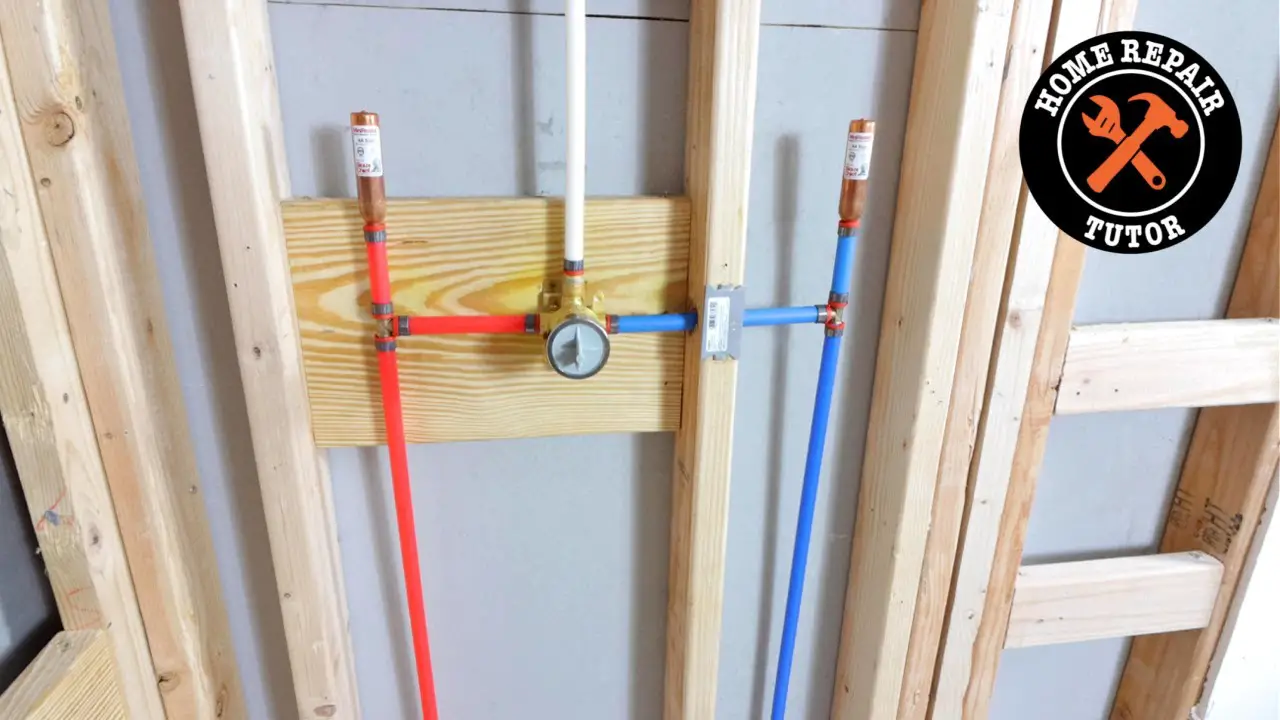
To install PEX pipe to a bathroom sink, first shut off the water supply and cut the PEX tubing to the necessary length. Ensure that you have the correct fittings and a PEX crimping tool at hand.
Embarking on a DIY plumbing project can be a rewarding way to enhance your bathroom sink’s functionality. The use of PEX pipes, known for their flexibility and durability, is a popular choice among homeowners looking to upgrade their plumbing systems.
This guide will provide you with straightforward instructions on connecting PEX piping to your bathroom sink, ensuring a leak-free installation. Whether you’re a seasoned DIY enthusiast or a novice, understanding the basics of PEX pipe installation is crucial. With the right tools and a clear understanding of the process, you’ll be able to tackle this task with confidence, improving water flow and modernizing your sink setup.
Introduction To Pex Pipe
Pex pipe, or cross-linked polyethylene tubing, is a versatile plumbing solution. It is a modern alternative to copper and PVC pipes, often used in residential water systems. In this section, we’ll explore the benefits of using Pex pipe for bathroom sink installation and the tools and materials you’ll need for the job.
Benefits Of Using Pex
- Flexibility: Pex pipes can bend around corners easily.
- Durability: These pipes resist corrosion and scale buildup.
- Easy Installation: Pex requires fewer fittings and connections.
- Cost-Effective: Pex is generally cheaper than copper piping.
- Energy Efficient: Pex maintains heat in hot water lines well.
Tools And Materials Needed
You will need certain tools and materials to install Pex pipe to a bathroom sink:
| Tool/Material | Use |
|---|---|
| Pex Tubing | Supply water to the sink |
| Pipe Cutter | Cut the Pex tubing |
| Pex Expansion Tool | Expand the pipe for fittings |
| Fittings | Connect pipes to fixtures |
| Mounting Hardware | Secure pipes in place |
Remember to have a plan before starting. Make sure all materials are at hand.

Credit: pandakitchen.com
Preparation For Installation
Before adding a PEX pipe to a bathroom sink, get ready first. This guide helps with the first steps.
Shutting Off The Water Supply
First, turn off the water. Find the main valve. Turn it left. No water should flow now. This step is crucial.
Measuring And Cutting Pex Pipe
Measure the pipe carefully. Use a tape measure. Write down the size. Now, cut the PEX pipe. Use a sharp cutter. Make sure the cut is straight. A clean cut is important.
- Step 1: Find the main water valve.
- Step 2: Turn it to the left to stop water.
- Step 1: Measure the pipe length needed.
- Step 2: Cut the PEX pipe with a cutter.
Remember, these steps prepare you for a smooth installation. Doing them right is key to success.
Connecting Pex To The Water Supply
Ready to connect PEX pipe to your bathroom sink’s water supply? This guide walks you through the process, ensuring a leak-free installation. Let’s start by selecting the right fittings.
Choosing The Right Fittings
Fittings connect PEX pipes to your sink’s water lines. You’ll need brass or plastic fittings compatible with PEX. Also, gather PEX clamps or crimp rings and a PEX crimping tool.
Securing The Connections
After fitting selection, ensure connections are secure. Cut the PEX pipe straight with a PEX cutter. Slide a crimp ring onto the pipe, then insert the fitting. Position the ring 1/8 inch from the pipe’s end.
Use the crimping tool to tighten the crimp ring. Ensure a snug fit without over-tightening. Check the connection with a go/no-go gauge. This step prevents leaks and ensures a durable connection to your sink’s water supply.

Credit: terrylove.com
Running Pex To The Sink
Today we’re tackling the task of running PEX to your bathroom sink. PEX piping offers a flexible and durable solution for your plumbing needs. Let’s dive into the steps to ensure a successful installation.
Planning The Pipe Layout
Before we start, it’s crucial to plan. A well-thought-out layout saves time and materials. Follow these steps:
- Measure the distance from the water source to the sink.
- Sketch the route the PEX will take.
- Identify where support brackets are needed.
- Ensure the route avoids sharp bends and heat sources.
Attaching Pex To The Sink
With the layout ready, it’s time to attach the PEX. Here’s a simple guide:
- Cut the PEX pipe to the measured length.
- Slide a crimp ring onto the pipe.
- Insert a fitting into the pipe’s end.
- Position the crimp ring and tighten with a crimp tool.
- Connect the other end to the sink’s shut-off valve.
Test for leaks by turning on the water supply. No leaks mean a job well done!
Installing Shut-off Valves
Let’s talk about Installing Shut-Off Valves for your bathroom sink. This step is key to controlling water flow. Perfect for repairs without stopping the whole house’s water supply. We’ll cover valve types and how to install them. Follow these simple steps to ensure a leak-free installation.
Types Of Shut-off Valves
Two main types exist: compression and push-fit. Both are great but suit different needs.
- Compression Valves: Need tightening around the pipe. They are very secure.
- Push-Fit Valves: Easy to install by pushing onto the pipe. Great for quick fixes.
Step-by-step Valve Installation
- Gather Tools: Ensure you have everything. This includes the valve, a pipe cutter, and emery cloth.
- Cut Pipe: Turn off the main water supply. Measure and cut the pipe where the valve will go.
- Prepare Pipe: Clean the pipe end with emery cloth. This makes a better surface for the valve.
- Install Valve: If it’s a compression valve, slide it onto the pipe, then tighten. For push-fit, just push it onto the pipe until it clicks.
- Check for Leaks: Turn the water back on. Check the valve for any leaks.
Remember, a tight fit and a clean pipe are key to a successful installation. Take your time and ensure everything is secure before turning the water back on.

Credit: www.pinterest.com
Testing For Leaks
Once your PEX piping connects to the bathroom sink, checking for leaks is crucial. This step ensures a watertight system. A proper leak test saves time and prevents water damage. Let’s focus on pressure testing and fixing any potential leaks.
Pressure Testing The Lines
Begin by shutting off the water supply. Attach a pressure gauge to the sink’s valve. Pump air into the system to a recommended PSI level. Check the gauge for 15 minutes. A steady reading means no leaks. A drop in pressure indicates a possible leak.
Identifying And Fixing Leaks
Look for wet spots along the PEX pipes. Inspect fittings and connections. Tighten any loose parts. Replace damaged sections if needed. Use a marker to note leak locations. After repairs, perform another pressure test. Confirm a steady pressure reading to ensure success.
Finishing Touches
Now that the PEX piping is connected, let’s add the finishing touches. These steps will ensure your bathroom sink’s plumbing is secure and efficient. We will focus on insulating and securing the PEX pipes.
Insulating Pex Pipes
Insulation keeps water temperatures stable. It prevents pipes from freezing in cold weather. Use foam insulation sleeves for the best results. Cut the sleeves to match the pipe lengths. Open the sleeve and wrap it around the pipe. Secure it with tape if necessary. Insulated pipes save energy and reduce costs.
Securing The Pipes In Place
Secure pipes to prevent movement and noise. Use clamps every 2 to 3 feet for best support. Choose clamps that fit the size of your PEX pipes. Attach clamps to walls or joists using screws. Ensure screws are tight for a firm hold. Check the entire length of the pipe for secure fitting.
Tip: After installation, turn on the water. Check for any leaks or issues. Make adjustments if needed.
Maintenance And Care
Proper maintenance ensures a long life for PEX pipes. It keeps the bathroom sink functioning well. Follow these tips to care for your PEX pipe installation.
Regular Check-ups
Set a schedule for inspecting your PEX pipes. Look for signs of wear or damage. Check for leaks or discoloration regularly. Tighten connections if they seem loose. Replace worn parts promptly to prevent bigger issues.
When To Call A Professional
Some situations need an expert’s touch. Call a plumber if you notice persistent leaks. Get help for changes in water pressure or quality. Seek professional advice for major repairs or installations.
Frequently Asked Questions
What Tools Are Needed For Pex Sink Installation?
To install PEX pipe to a bathroom sink, you’ll need PEX tubing, fittings, a PEX cutter, and a crimping tool.
Can Pex Be Used For Hot Water Lines?
Yes, PEX piping is suitable for hot water lines and offers durability and flexibility for plumbing needs.
How Do You Connect Pex To Existing Plumbing?
Connecting PEX to existing plumbing requires a compatible fitting, either push-fit or crimp, to securely join the pipes.
How Long Does Pex Piping Last?
PEX piping typically lasts between 25 to 40 years, depending on water conditions and usage patterns.
Does Pex Require Special Sink Fixtures?
PEX does not require special sink fixtures, but you need the correct size PEX fittings to match your fixture’s connections.
Conclusion
Wrapping up, installing PEX pipe to your bathroom sink boosts both functionality and efficiency. With the right tools and steps, this task is achievable for DIY enthusiasts. Remember, patience and precision are your best allies in ensuring a leak-free installation.
Embrace the challenge, and enjoy the rewards of your hard work.

