Replacing the heating element in a dishwasher might sound difficult, but it’s a task many homeowners can do with the right instructions. Maybe you’ve noticed your dishes aren’t drying, or you feel cold water at the bottom after a cycle.
Often, this points to a faulty heating element. Fixing this problem yourself can save you time and money, and give you confidence to handle other small repairs around your home.
This guide will walk you through everything you need to know. You’ll learn how to check if your heating element is really broken, what tools and parts you need, how to safely remove the old element, and how to install the new one.
Along the way, you’ll discover tips that even experienced DIYers sometimes overlook. By the end, you’ll have a dishwasher that works like new—and a real sense of accomplishment.
Understanding The Dishwasher Heating Element
The heating element in your dishwasher is a metal coil, usually found at the bottom of the tub. Its main job is to heat water during the wash and rinse cycles, and to dry dishes at the end. If your dishes come out wet or not clean, the heating element could be the cause.
Most dishwashers use an electric heating element rated between 1200–1800 watts. You can usually spot it: it looks like a thick, curved rod or ring. Some newer models use a hidden or underfloor element, but the basic function is the same.
A faulty heating element can cause:
- Dishes not drying
- White spots or residue on dishes
- Water not getting hot enough to clean well
Replacing the heating element is a common repair. But before you buy a new part, make sure the element is really the problem.
Signs Your Dishwasher Heating Element Needs Replacing
Not every dishwasher issue is caused by a broken heating element. Here are some clear signs:
- Cold Dishwasher After Cycle: Open the door right after a cycle. If the inside feels cold and the dishes are wet, the element may not be working.
- No Steam: Normally, you see steam when opening the door after a hot cycle. No steam means the water didn’t heat up.
- Error Codes: Many modern dishwashers will show an error code if the heating element isn’t working. Check your manual for what the codes mean.
- Burn Marks: Visible black marks or cracks on the heating element often mean it has failed.
- Multimeter Test: The most certain way is to use a multimeter to check for electrical continuity (explained later).
If you see one or more of these signs, it’s time to consider a replacement.
Safety Precautions Before Starting
Working with electrical parts means you must be careful. Here’s how to stay safe:
- Unplug the Dishwasher: Always disconnect power before any repair.
- Turn Off Water Supply: Prevent leaks by shutting off the dishwasher’s water valve.
- Wear Gloves: The element and surrounding parts can be sharp or dirty.
- Have a Towel Ready: Some water may spill when you disconnect hoses.
Never skip these steps. Even experienced technicians sometimes forget, leading to avoidable accidents.
Tools And Parts You Will Need
Before starting, make sure you have everything ready:
- Replacement heating element (make sure it matches your dishwasher model)
- Screwdriver set (usually Phillips and flathead)
- Adjustable wrench
- Needle nose pliers
- Multimeter (for testing the old and new elements)
- Work gloves
- Towel or small bucket (to catch water)
- Flashlight (dishwasher interiors can be dark)
- Dishwasher-safe sealant (sometimes needed for gaskets)
Check your dishwasher’s manual or look up the model number, often found on the door frame, to order the correct part.
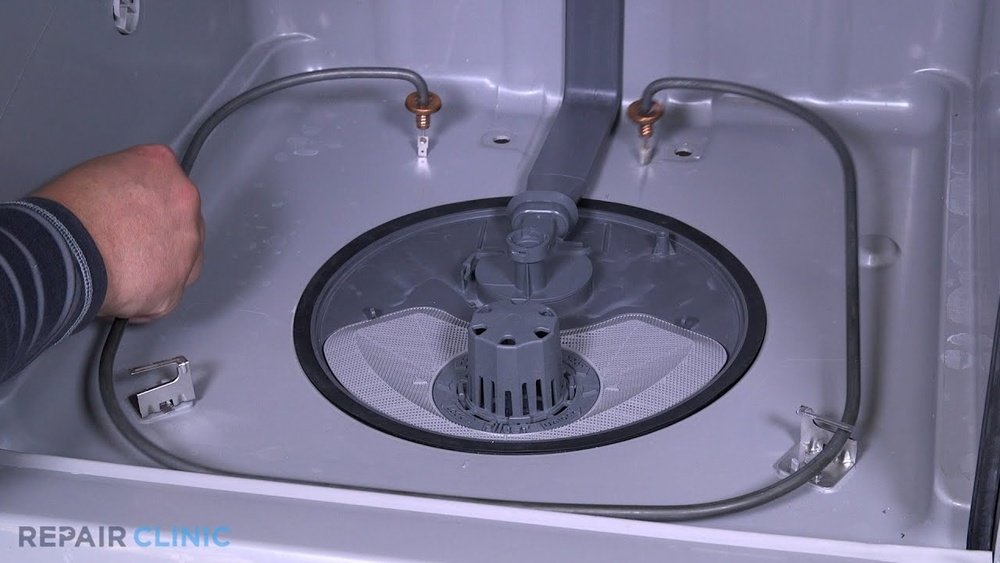
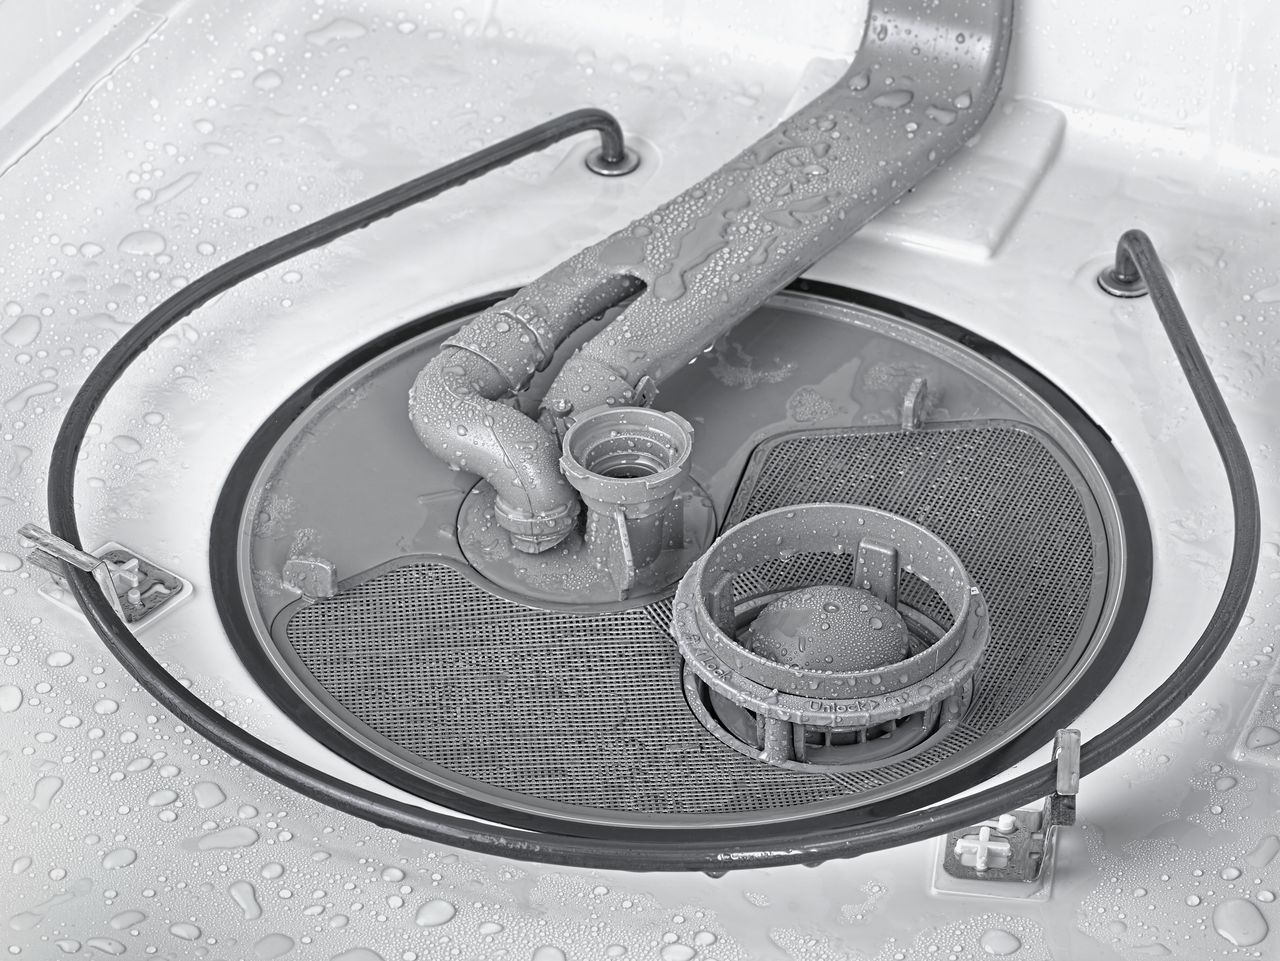
How To Access The Heating Element
Most dishwashers have the heating element in plain view, but replacing it often means getting under the machine.
- Remove the Lower Dish Rack: Pull out the bottom rack for more room.
- Locate the Element: Find the curved or circular metal rod at the bottom of the tub.
- Check for Screws or Clips: Some elements are held in place by mounting brackets or nuts you can see. Others attach from underneath the dishwasher.
If you’re not sure, a quick look at your manual or a photo search for your model will help.
Testing The Heating Element
Before removing the old element, it’s smart to test it. This step can save you from replacing a part that works.
How To Use A Multimeter
- Unplug the Dishwasher: Never skip this for safety.
- Access the Terminals: Depending on your dishwasher, you might need to tip it back and remove the access panel underneath.
- Remove Wires from the Element: Use needle nose pliers.
- Set the Multimeter to Ohms (Ω): You’re checking for continuity.
- Touch the Probes to Each Terminal: No need to worry about polarity.
- Read the Result:
- Normal resistance: Usually 10–50 ohms (check your manual)
- No continuity (infinite resistance): The element is bad.
If you see no reading, it’s time to replace the heating element.
Removing The Old Heating Element
Now you’re ready to take out the faulty element. This is usually straightforward, but watch for a few common obstacles.
- Disconnect Water and Power: Double check this step.
- Take Out the Lower Rack: You need clear access.
- Remove Mounting Nuts or Clips: Look underneath the dishwasher for two metal nuts (one at each end of the element). Use your wrench to loosen them.
- Pull Out the Element: Push up from below while gently pulling from above.
- Check for Seals or Gaskets: If your model uses rubber gaskets, save them if they’re in good shape. If not, replace with new ones.
Be gentle. Forcing the element can break the tub or connectors.
Preparing The New Heating Element
Before installing, compare the new and old elements:
- Shape and Size: They should match exactly.
- Terminal Type: The connectors must look the same.
- Wattage: Check the rating on the new element matches your dishwasher.
If anything looks wrong, contact the supplier before installing.
Some elements include new nuts or gaskets. Always use new parts if provided. For extra protection, add a thin layer of dishwasher-safe sealant around the gaskets.
Installing The New Heating Element
Here’s how to put in the new element correctly:
- Insert the New Element: Place the ends through the holes in the tub.
- Go Underneath the Dishwasher: Secure the ends with new nuts or clips.
- Reconnect the Wires: Use pliers to attach the wire connectors to each terminal.
- Tighten Nuts Securely: Don’t overtighten—just enough to hold firmly.
- Replace Gaskets: If your model uses them, make sure they’re seated flat.
Pro tip: Some dishwashers have a thermal fuse near the element. Check this part for damage—replacing a burnt-out fuse is cheap and easy.
Reassembling And Testing
With the new element in place, it’s time to put everything back:
- Replace Lower Rack: Slide it back into position.
- Reconnect Power and Water: Plug the dishwasher in and turn the water valve back on.
- Run a Short Cycle: Choose a cycle with a heated dry or sanitize function.
- Check for Leaks: Look underneath for drips from the terminals.
- Test for Heat: Open the door during the dry cycle. You should feel warm air and see steam.
If Everything Works, You’ve Done The Job Right!
Step-by-step Summary Table
To give you a quick overview, here’s a summary of the replacement process:
| Step | Description | Time Needed |
|---|---|---|
| 1 | Unplug and turn off water | 2 minutes |
| 2 | Remove lower rack | 1 minute |
| 3 | Test heating element | 10 minutes |
| 4 | Remove old element | 15 minutes |
| 5 | Install new element | 15 minutes |
| 6 | Reassemble and test | 10 minutes |
Most people can finish the whole job in about 45–60 minutes.
Common Problems And Solutions
Even with good instructions, things can go wrong. Here’s how to handle some common issues:
Problem 1: Heating Element Doesn’t Fit
Solution: Double-check the part number and compare the old and new elements. If the terminals or shape are different, you may have the wrong part. Always order by your dishwasher’s model number.
Problem 2: Water Leaks After Replacement
Solution: This usually means a gasket is missing or not seated properly. Remove the element, clean the area, and reinstall with a new gasket and a small amount of sealant.
Problem 3: Dishwasher Still Not Heating
Solution: If the new element doesn’t work, check:
- Wiring connections
- The thermal fuse (if present)
- Control board or thermostat
Sometimes, the problem is a blown fuse or a broken wire, not the element itself.
Problem 4: Error Code Remains
Solution: Clear the dishwasher’s memory by unplugging for 5–10 minutes. If the code returns, there may be another issue.
Problem 5: Breaker Trips When Running Dishwasher
Solution: This can happen if wires are shorted or a terminal is touching metal. Disconnect and check all connections for loose strands or damage.
Mistakes To Avoid
Many first-timers make small errors that can lead to bigger problems. Here’s what to watch out for:
- Skipping the Multimeter Test: Don’t replace a working element—test first.
- Forgetting to Turn Off Power: This is risky and can cause electric shock.
- Using the Wrong Replacement Part: Dishwasher models vary. Always match the model number.
- Reusing Old Gaskets: Even if they look okay, old gaskets can leak.
- Overtightening Nuts: This can crack the tub or strip threads.
- Not Checking for Leaks: Run a test cycle before putting the kick plate back on.
How Much Does It Cost?
Heating elements are usually affordable, but costs can vary. Here’s a comparison:
| Type | Price Range (USD) | Notes |
|---|---|---|
| Standard heating element | $20–$50 | Most common models |
| High-end/hidden element | $50–$100 | Special order, rare models |
| Professional installation | $100–$200 | Labor cost only |
Doing it yourself, you’ll only pay for the part and maybe a new wrench or sealant.

Credit: www.hnkparts.com
When To Call A Professional
Replacing a dishwasher heating element is not for everyone. Call a pro if:
- You’re not comfortable working with electricity or plumbing
- The dishwasher is built-in and hard to access
- The wiring looks damaged or burnt
- There are other electrical issues in your kitchen
A technician will have the tools and experience to fix the problem quickly and safely.
Dishwasher Brands And Heating Element Differences
Not all dishwashers are built the same. Here’s how some major brands handle heating elements:
| Brand | Heating Element Location | Special Notes |
|---|---|---|
| Whirlpool | Visible, bottom of tub | Easy DIY replacement |
| Bosch | Hidden, under base | May need to remove more panels |
| GE | Visible, bottom of tub | Standard replacement process |
| LG | Hidden, often under tub | Check manual for access steps |
| Samsung | Visible or hidden, model-dependent | Always check model number |
Always check your owner’s manual for brand-specific instructions.

Credit: www.youtube.com
Tips For A Longer-lasting Heating Element
Once you’ve installed a new element, you want it to last. Here’s how:
- Run Hot Water First: Before starting your dishwasher, run the kitchen tap until the water is hot. This helps the element heat water faster, reducing strain.
- Avoid Hard Water Buildup: Mineral deposits can coat the element and cause it to overheat. Use dishwasher cleaner every few months.
- Don’t Overload: Too many dishes can block water flow, making the element work harder.
- Use the Right Detergent: Cheap detergent can leave residue on the element.
- Inspect Regularly: Every few months, check for discoloration or cracks.
These simple habits can add years to your dishwasher’s life.
Environmental Considerations
Old heating elements contain metal and sometimes plastic or rubber. Don’t throw them in the trash if you can recycle. Many cities have appliance recycling programs that safely handle these materials. Check with your local waste authority for rules.
Credit: twincitiesappliance.com
Additional Resources
If you want more help, many dishwasher manufacturers offer online guides and videos. You can also find step-by-step video tutorials on YouTube by searching your model number. For official guidance, see the Wikipedia Dishwasher page.
Frequently Asked Questions
How Do I Know If My Dishwasher Heating Element Is Bad?
You’ll notice dishes aren’t dry, there’s no steam after a cycle, or you see error codes. The best way to be sure is to test the element with a multimeter for continuity.
Can I Replace A Heating Element Myself, Or Do I Need A Professional?
Most homeowners can do this job with basic tools and careful steps. However, if you feel unsure or see damaged wiring, it’s best to call a professional.
How Long Does It Take To Replace A Dishwasher Heating Element?
For most people, it takes about 45–60 minutes from start to finish, including testing and reassembly.
Will Any Heating Element Fit My Dishwasher?
No. You must buy a heating element that matches your dishwasher’s brand and model number. Always check before ordering.
What Happens If I Don’t Replace A Faulty Heating Element?
Your dishes won’t get clean or dry properly. Over time, this can cause buildup and might even damage other parts of your dishwasher.
Replacing the heating element in your dishwasher is a practical way to save money and keep your appliance running well. With a little preparation and care, you’ll have clean, dry dishes again in no time.