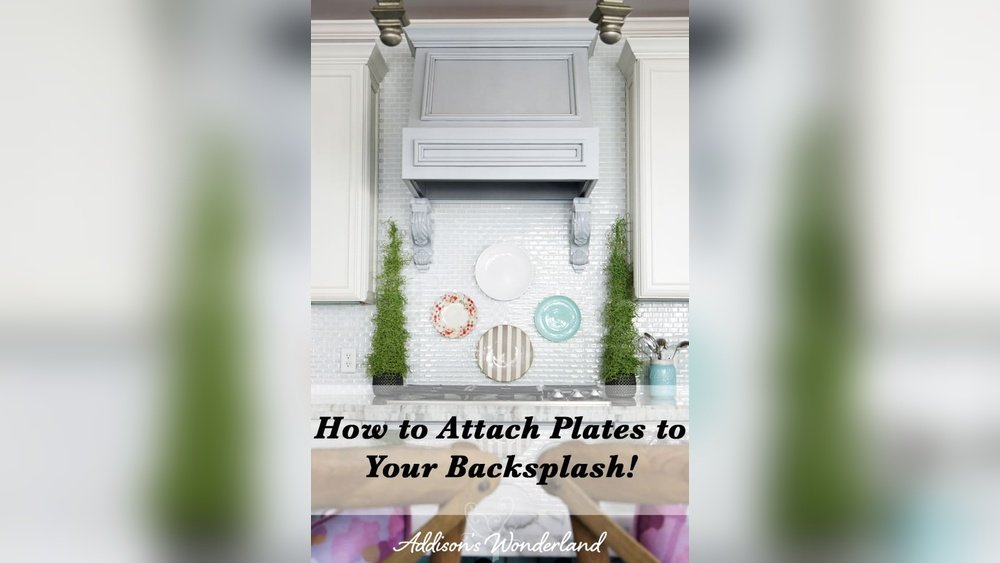
Decorative plates are not just for dining tables or kitchen cupboards anymore. These beautiful pieces can become a statement on your kitchen backsplash, adding personality, color, and even a touch of nostalgia to the heart of your home. Hanging plates on a backsplash is a smart way to showcase treasured china, unique ceramics, or travel souvenirs.
But it’s not as simple as just sticking a nail in the wall—backsplashes are often made of tile, glass, or stone, which can make hanging anything a challenge. This guide will walk you through everything you need to know to hang plates on your backsplash safely, beautifully, and with lasting results.
Why Hang Plates On A Backsplash?
Adding plates to your backsplash is about more than decoration. It’s a way to express your style and make your kitchen unique. Plates can add:
- Visual interest with patterns and colors
- Texture and dimension to flat surfaces
- Personal memories if you use heirloom or travel plates
People often think of art or photos for walls, but plates are durable, easy to clean, and designed for kitchen use. They’re also a solution for awkward spaces that might not fit shelves or large art.
Choosing The Right Plates For Your Backsplash
Before you start, think about what plates will work best.
Size And Shape
Choose plates that fit the space without looking crowded or getting in the way of your counters or outlets. Standard dinner plates are about 10–12 inches wide, salad plates are 7–8 inches, and small dessert plates are 6–7 inches. For small backsplashes, smaller plates or even saucers may look better.
Material
Most people choose ceramic or porcelain plates for their rich colors and durability. However, you can also use glass, metal, or even lightweight melamine if you prefer.
Design And Color
Think about your kitchen’s color scheme. White plates look fresh and classic, while bright or patterned plates add energy. Mix and match for a modern look, or stick to one color for harmony.
Plate Weight
Heavier plates need stronger hangers. Always check the weight of your plates before choosing hanging hardware.
Non-obvious Insight: Avoid Curved-back Plates
Plates with very curved or deep backs can be hard to hang flat on a wall, especially on tile. Choose plates with a shallow rim for a neater look.
Planning Your Plate Layout
A successful plate wall starts with a plan.
Measure The Space
Use a tape measure to find the height and width of your backsplash. Mark out any obstacles, like electrical outlets, switches, or shelves.
Choose Your Arrangement
Popular layouts include:
- Horizontal row: Simple and clean, good for narrow spaces.
- Vertical stack: Great for tall, slim spaces beside a window or range hood.
- Cluster: Plates grouped in a loose, organic shape.
- Symmetrical grid: Neat, formal look using even rows and columns.
Mock Up Your Design
Lay your plates on the counter or floor in the shape you want. You can trace each plate on paper and tape the shapes to the wall to see how the arrangement will look at eye level.
Spacing
Leave at least 2–3 inches between each plate to prevent a crowded look.
Non-obvious Insight: Consider Cleaning Access
Plates above a stove or prep area can get splattered with grease and water. Leave enough space so you can wipe behind or around each plate.
Tools And Supplies Needed
Hanging plates on a backsplash requires specific tools. Here’s what you’ll need:
- Measuring tape
- Pencil
- Level (for straight lines)
- Painter’s tape (for marking positions)
- Drill (if mounting to tile, stone, or glass)
- Glass/tile drill bit (never use a regular bit on tile)
- Wall anchors (for heavy plates)
- Screws or specialty plate hooks
- Plate hangers (spring-type or adhesive disk)
- Adhesive hooks (if you want to avoid drilling)
- Safety goggles and mask (for drilling)
- Vacuum or brush (to clean up dust)
Comparing Plate Hanging Methods
You have several options for attaching plates to a backsplash, each with pros and cons.
| Method | Pros | Cons | Best For |
|---|---|---|---|
| Spring Plate Hangers | Strong, reusable, secure hold | Visible wires, requires hook/anchor in wall | Heavy or valuable plates |
| Adhesive Plate Discs | No visible hardware, easy to remove | May not hold heavy plates, not for rough tiles | Light to medium plates, smooth tile |
| Adhesive Hooks | No drilling, easy to reposition | Can fail in humidity or on textured tile | Rental homes, light plates |
| Drilled Screws/Hooks | Very strong, permanent | Requires drilling tile, can damage backsplash | Heavy plates, stone or glass tile |
Step-by-step: Hanging Plates On Tile Backsplash
Tile is the most common backsplash material, but it’s also tricky to drill into. Here’s how to do it safely.
1. Prepare The Area
Clean the tile with soap and water. Dry completely. Mark your planned plate positions lightly with pencil or painter’s tape.
2. Choose The Right Drill Bit
Use a carbide-tipped or diamond-tipped drill bit for ceramic or glass tile. Never use a regular masonry bit—it can crack the tile.
3. Mark Drill Points
Place a piece of painter’s tape over the spot you’ll drill. This helps prevent the bit from slipping.
4. Drill Slowly
Set your drill to a low speed. Press gently to avoid cracking the tile. Once you are through the tile glaze, you can speed up a little.
5. Insert Anchors
If your backsplash is over drywall, insert plastic wall anchors for extra strength. If it’s stone or cement backer board, use heavy-duty anchors.
6. Screw In Hooks
Install your hooks or screws. Use rubber washers if you are worried about cracking.
7. Hang The Plates
Attach plate hangers to your plates. Hang each plate, checking that it is secure.
8. Check Stability
Gently shake each plate. If anything feels loose, tighten or adjust the hook.
Step-by-step: Hanging Plates Without Drilling
Drilling can damage tile and may not be allowed in a rental. Adhesive options are a smart solution.
1. Clean The Surface
Wipe the tile with rubbing alcohol. This removes grease and helps adhesive stick.
2. Use Adhesive Hooks
Choose strong adhesive hooks rated for the weight of your plates. Stick them where you want to hang each plate. Wait at least one hour before hanging.
3. Use Adhesive Plate Discs
Attach an adhesive disc to the back of each plate. Follow the instructions—usually you must wet the disc and let it dry for 24 hours.
4. Hang The Plates
Hang the plate from the hook, or use the adhesive disc alone for light plates.
5. Test For Strength
Wait a few hours before hanging all your plates to make sure the adhesive is set.
Non-obvious Insight: Humidity And Heat
Many adhesives weaken in humid or hot kitchens. Avoid hanging plates above a stove with adhesive-only methods if you cook often.
Alternative Methods: Hanging On Stone Or Glass Backsplash
Stone and glass are even harder to drill than tile. For these surfaces:
- Use removable adhesive hooks designed for glass.
- Try removable putty for ultra-light plates or saucers (not recommended for valuable items).
- For very heavy or valuable plates, consider a decorative shelf mounted to the cabinets above the backsplash, then lean the plates.
Essential Safety Tips
Always keep safety in mind:
- Wear safety goggles when drilling.
- Never hang plates directly above a stove burner or open flame.
- Make sure plates are secure before letting children or pets near the area.
- Double-check the weight limits of all hangers and adhesives.
Mistakes To Avoid
Hanging plates on a backsplash may seem simple, but these common mistakes can ruin the look—or even damage your kitchen.
- Skipping weight checks: Overloading an adhesive hook can cause plates to fall.
- Drilling too quickly: This can crack tile or glass.
- Not cleaning the wall: Grease and dust prevent adhesives from sticking.
- Using the wrong hangers: Only use hangers rated for your plate’s weight and size.
- Ignoring humidity: Kitchens are moist, which can weaken many adhesives.
- Placing plates too close to heat sources: This can damage both the plate and the hanger.
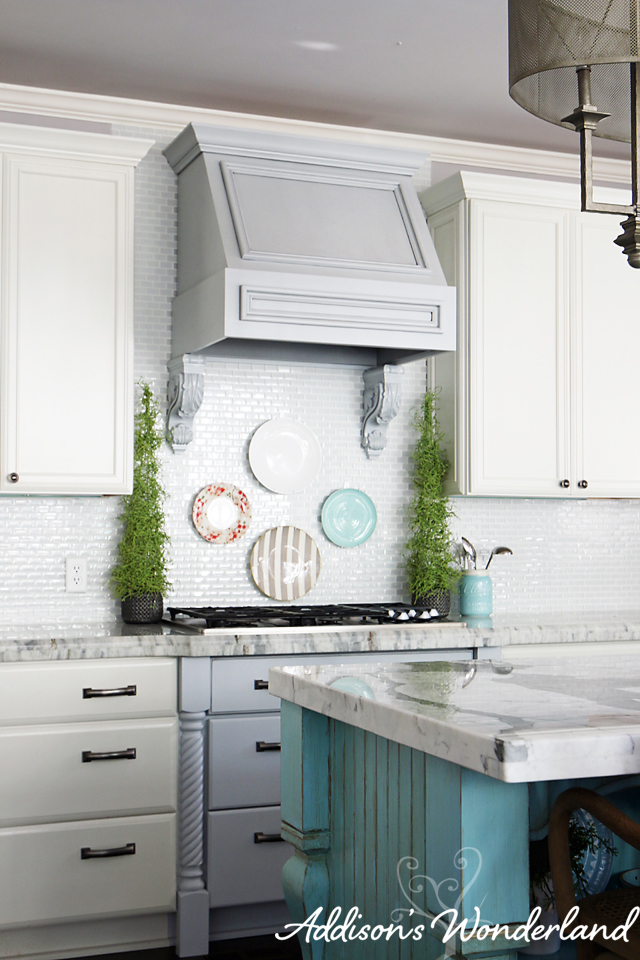
Credit: addisonswonderland.com
Maintenance And Cleaning
Plates on a backsplash will collect dust and grease over time. Here’s how to keep them looking their best.
Regular Dusting
Use a microfiber cloth or soft duster to remove surface dust weekly.
Spot Cleaning
For greasy spots, gently wipe with a damp sponge and mild dish soap. Avoid soaking the area, especially if you used adhesive hangers.
Checking For Looseness
Once a month, check that all hangers and hooks are tight. Adhesive hangers may need to be replaced every year.
Deep Cleaning
Every few months, carefully remove plates and wash them with warm water and mild soap. Dry completely before hanging again.
Creative Plate Display Ideas
Hanging plates does not have to be boring or traditional. Here are some creative ways to make your display stand out:
- Mix sizes and colors: Combine small and large plates, or mix old and new.
- Add other elements: Hang a small framed print or a clock among the plates.
- Use seasonal plates: Change your display for holidays or seasons.
- Vertical stripes: Hang plates in a column for a modern look.
- Mirror backing: Place a small mirror behind a plate for extra shine.

Credit: www.ballarddesigns.com
Comparing Hanger Types
Not sure which hanger to choose? This quick comparison can help.
| Hanger Type | Visibility | Weight Capacity | Removal |
|---|---|---|---|
| Spring Hanger | Low (but visible wires) | Up to 5 lbs | Easy, reusable |
| Adhesive Disc | Invisible from front | Up to 2 lbs | Removable, may damage finish |
| Adhesive Hook | Small hook visible | Up to 4 lbs | Easy, usually no residue |
| Putty | Invisible if used well | Up to 1 lb | Easy, no damage |
Troubleshooting Common Problems
Sometimes, things don’t go as planned. Here’s how to fix common issues.
Plate Slips Or Falls
- Double-check the weight of the plate and the rating of your hanger.
- If using adhesive, try a stronger brand or add a second hook for support.
Tile Cracks When Drilling
- Drill slowly and use a sharp, proper bit.
- If a crack appears, stop drilling and seal the crack with clear silicone.
Adhesive Won’t Stick
- Clean the tile with rubbing alcohol and let dry.
- Warm the adhesive with a hair dryer for 10 seconds before applying.
Plates Look Uneven
- Use a level for every row.
- If the plate is hung by wire, adjust the tension or reposition the hook.
Hanger Damages Plate
- Use hangers with rubber tips or pads.
- For valuable or antique plates, consider shadow box frames instead.
When To Call A Professional
Most people can hang plates themselves. But if your backsplash is made of expensive stone, glass, or has under-cabinet lighting, you may want a professional installer. This is also a good idea if you are hanging very heavy or valuable plates.
Sustainability And Plate Hanging
Eco-friendly options are growing in popularity. Reuse plates from thrift shops or estate sales for your backsplash display. Choose reusable hangers instead of single-use adhesives. When you change your display, donate old plates instead of throwing them away.
Credit: www.ballarddesigns.com
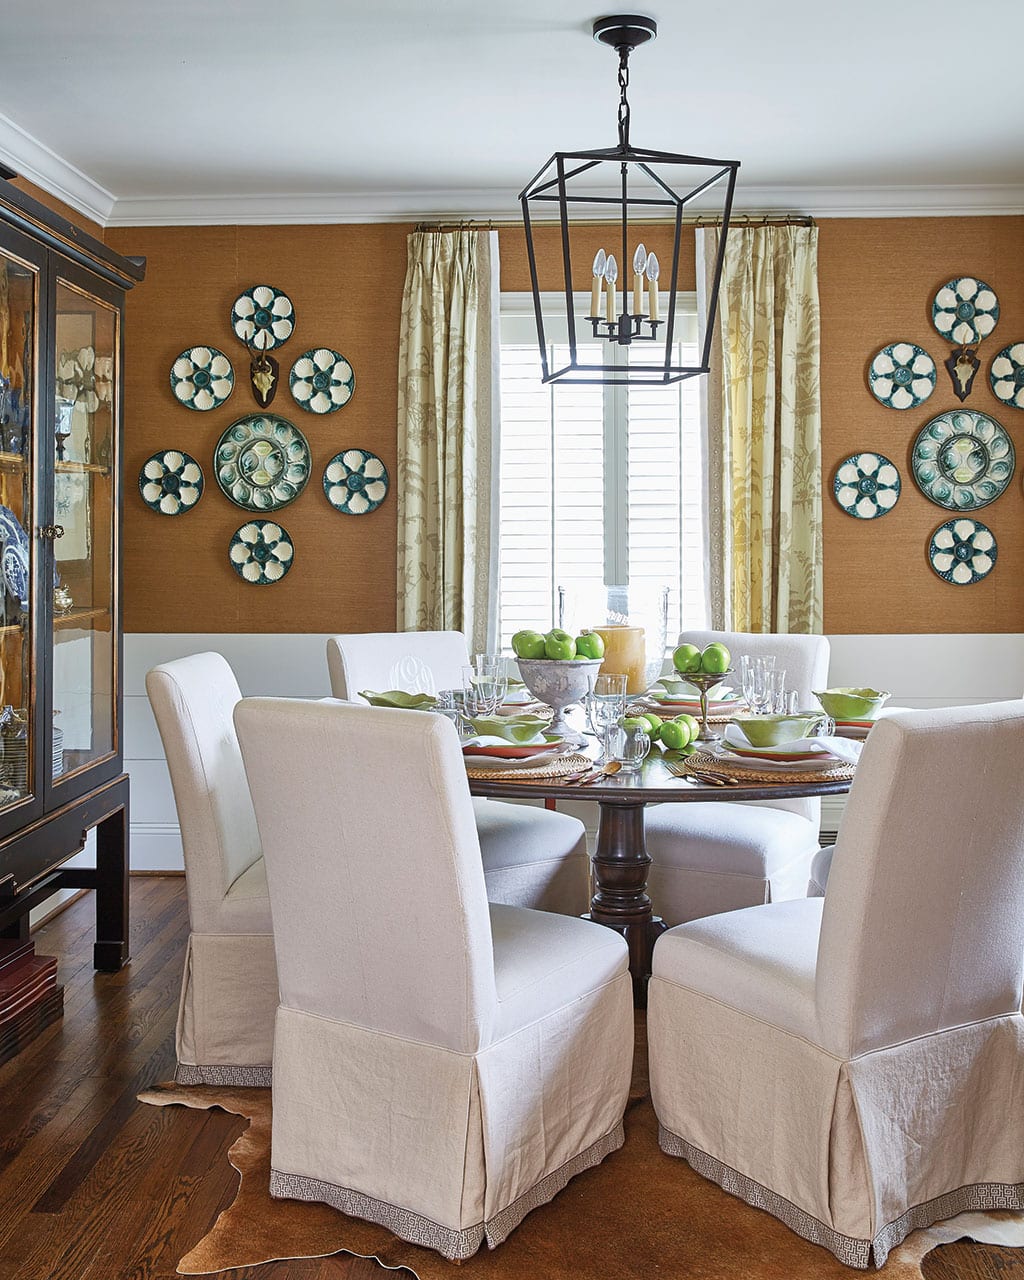
Inspiring Real-life Examples
Many homeowners have used backsplash plate displays to transform their kitchens.
- A farmhouse kitchen uses all-white plates above a subway tile backsplash, adding simple elegance.
- A Mediterranean kitchen displays colorful hand-painted plates from travels to Italy and Spain.
- In a modern home, black and white graphic plates are arranged in a tight cluster, acting as bold art above the sink.
Browse design magazines or Pinterest for more ideas. For more on interior design with plates, visit the Wikipedia Plate (dishware) page.
Cost Breakdown
How much will it cost to hang plates on your backsplash? Here’s a quick look.
| Item | Average Cost (USD) | Notes |
|---|---|---|
| Plates (each) | $2–$20 | Thrift to designer |
| Spring Hanger | $3–$5 | Reusable |
| Adhesive Disc | $2–$4 | One-time use |
| Adhesive Hook | $1–$3 | Pack of 4–8 |
| Drill & Bit | $20–$50 | May already own |
| Wall Anchors/Screws | $3–$5 | Pack of 10–20 |
The total cost depends on how many plates you hang and what hardware you choose. For most kitchens, expect $20–$100 for a small display.
Frequently Asked Questions
How Do I Hang Plates On A Backsplash Without Drilling?
You can use adhesive hooks or adhesive plate discs. Clean the tile with rubbing alcohol, then apply the adhesive. Make sure the adhesive is rated for your plate’s weight. Wait at least one hour (or as directed) before hanging the plate.
Can I Hang Plates On A Glass Backsplash?
Yes, but avoid drilling into glass unless you have experience and special tools. Use strong adhesive hooks or removable putty for very light plates. Make sure the adhesive is clear or white so it won’t show through the glass.
Will Hanging Plates Damage My Tile?
If you drill into tile, there is always some risk of cracking or chipping. Drill slowly with a sharp bit, and use tape to prevent slipping. Adhesive hangers are safer, but may leave sticky residue. Always test adhesives in a small area first.
How Much Weight Can Adhesive Hooks Hold?
Most adhesive hooks hold 1–4 pounds each. Check the package for the rating. For heavier plates, use two hooks or switch to a drilled anchor for safety.
Are Plate Hangers Reusable?
Spring plate hangers and most adhesive hooks are reusable. Adhesive discs may not stick well after being removed and reapplied. Test before reusing, especially with valuable plates.
Hanging plates on your backsplash is a creative way to bring style and color into your kitchen. With careful planning and the right tools, you can create a display that is both beautiful and safe. Remember to choose the right hardware for your plates and backsplash material, and check your display often to keep it secure.
With these tips, your kitchen will have a unique focal point that’s sure to draw compliments for years to come.