If you love baking, you may have seen a scone pan and wondered how it works. These pans look different from regular baking trays. Instead of a flat surface, a scone pan has divided sections, like slices of a pie. Some bakers think scone pans are only for fancy kitchens, but the truth is, anyone can use one at home. Knowing how to use a scone pan helps you make perfect, even scones every time. You get neat shapes, equal sizes, and a golden crust on each piece.
This article will show you everything you need about using a scone pan. You’ll learn why people use them, how to pick the right one, how to prepare, mix, and bake scones, and how to clean and store your pan.
We’ll also compare scone pans with other baking tools, share pro tips, and answer common questions. Whether you are new to baking or want to improve your scones, you will find practical advice here.
What Is A Scone Pan?
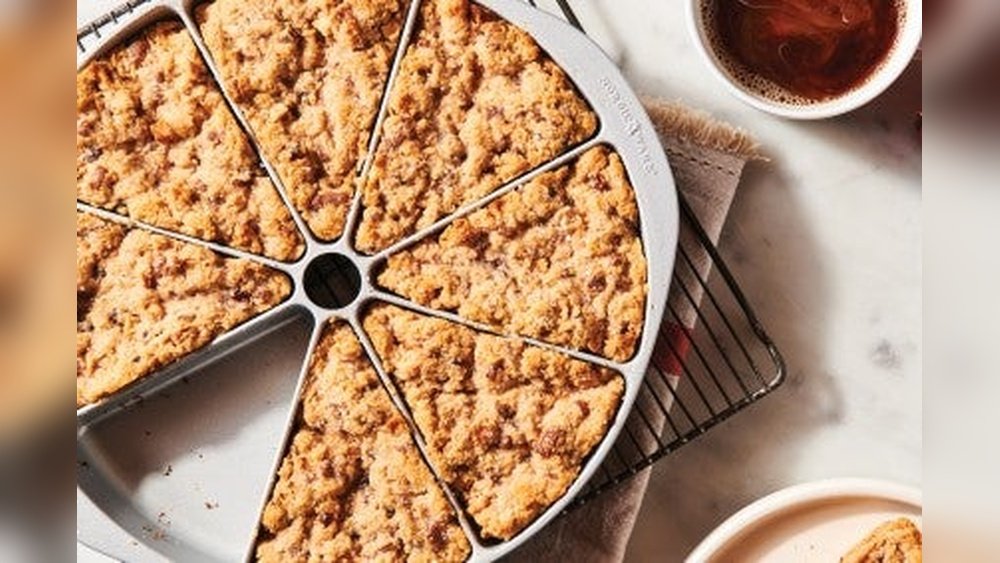
A scone pan is a round or wedge-shaped baking pan, usually divided into 6 or 8 triangular sections. Each section is like a slice of pie. The pan is made from materials like cast iron, heavy-duty aluminum, or nonstick metal. The main job of a scone pan is to shape and separate dough into equal triangles as it bakes.
Traditional scones are cut and shaped by hand. But with a scone pan, you press dough into the pan, and every piece bakes evenly. The result is scones with crisp edges, soft centers, and a perfect look. Some pans also work for cornbread, brownies, or biscuits.
Non-obvious insight: Many beginners don’t realize scone pans make portion control easier. Every scone is the same size, so nobody fights for the biggest piece. This is helpful for events, bake sales, or tea parties.
Why Use A Scone Pan Instead Of Hand-shaping?
Some bakers still shape scones by hand, cutting dough into wedges with a knife. Why use a special pan instead?
- Uniform baking: Each wedge bakes at the same rate, so no undercooked or burnt edges.
- Consistent shape: Every scone looks neat and tidy—great for gifts or parties.
- Easy portioning: No guessing or measuring. You get exact sizes every time.
- Less sticking: The pan’s finish (often nonstick or seasoned cast iron) helps scones release easily.
- Saves time: No need to shape, cut, or adjust dough on a tray.
Practical tip: If you want scones with a crispy edge and soft middle, a scone pan gives the best texture.
Types Of Scone Pans: Materials And Shapes Compared
Scone pans come in different styles. Your choice affects baking time, cleanup, and the final taste.
| Material | Heat Distribution | Durability | Nonstick? | Care Needed |
|---|---|---|---|---|
| Cast Iron | Excellent | Very high | Yes (if seasoned) | Hand wash, keep dry |
| Aluminum | Good | Moderate | Usually coated | Dishwasher safe |
| Nonstick Metal | Good | Moderate | Yes | Gentle cleaning |
| Silicone | Fair | High | Yes | Easy to clean |
Cast iron scone pans are heavy and last for generations. They hold heat well, giving a crispy crust. But they need seasoning (oil baked into the surface) and careful drying. Aluminum pans heat quickly and are often nonstick, but can warp if dropped. Nonstick pans are easy to clean and good for beginners. Silicone scone pans are flexible and dishwasher-safe, but don’t brown scones as well.
Non-obvious insight: Cast iron pans work best for high-heat, rustic scones. If you want softer scones, try silicone or nonstick metal.
Choosing The Right Scone Pan
There are a few things to check before you buy:
- Size: Most pans make 6 or 8 scones. A 9-inch pan is common for families.
- Number of sections: More sections mean smaller scones, fewer sections make larger ones.
- Material: Think about weight, cleaning, and how much crust you want.
- Handles: Some pans have handles for easy lifting.
- Oven safety: Make sure the pan fits your oven and can handle high temperatures.
- Brand reputation: Read reviews or ask bakers for trusted brands. Cheap pans often stick or warp.
Practical example: If you bake for one or two people, a mini scone pan (6 sections) avoids waste. For parties, a larger, 8-section pan is better.
Preparing Your Scone Pan
Before you start baking, prepare your scone pan the right way:
- Clean before first use: Wash new pans with warm, soapy water and dry well.
- Season if needed: For cast iron, rub a thin layer of vegetable oil inside. Bake at 375°F (190°C) for 1 hour, then cool. This stops rust and creates a nonstick layer.
- Grease the pan: Even nonstick pans need a light coat of butter or oil. Use a brush or paper towel. This helps scones release and adds flavor.
- Preheat the pan (optional): Some bakers preheat cast iron scone pans for a crispier crust. Place empty pan in oven for 5–10 minutes before adding dough.
Common mistake: Skipping the greasing step. Even “nonstick” pans can stick, especially with rich doughs.
Making Scone Dough For A Scone Pan
Scone dough is simple, but the right steps make a big difference. Here’s a classic scone dough recipe for an 8-section pan.
Ingredients
- 2 cups (250g) all-purpose flour
- 1/3 cup (65g) sugar
- 1 tablespoon baking powder
- 1/2 teaspoon salt
- 1/2 cup (115g) cold unsalted butter, cut into small cubes
- 2/3 cup (160ml) heavy cream (plus extra for brushing)
- 1 large egg
- 1 teaspoon vanilla extract
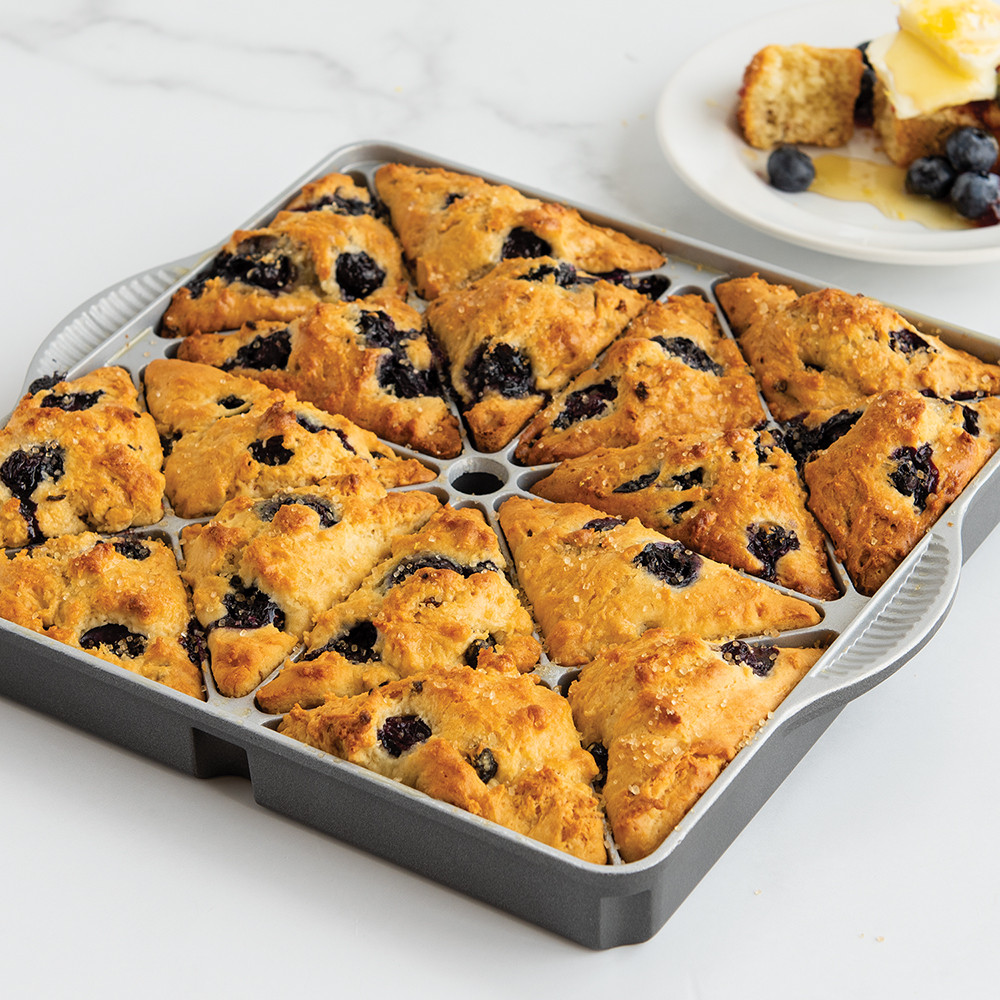
- Optional: 1 cup fresh berries, dried fruit, or chocolate chips
Steps
- Mix dry ingredients: In a large bowl, combine flour, sugar, baking powder, and salt.
- Cut in butter: Add cold butter cubes. Use a pastry blender, two knives, or your fingers to rub butter into flour. Stop when the mix looks like coarse crumbs.
- Add wet ingredients: In a small bowl, whisk cream, egg, and vanilla. Pour into dry mix. Stir until dough just comes together (do not overmix).
- Add extras: Fold in berries, nuts, or chocolate if desired.
- Handle gently: The dough should be a bit sticky but not wet. If too dry, add a tablespoon of cream.
Pro tip: Cold butter and cold cream make flaky scones. Warm ingredients make scones dense.
Credit: www.nordicware.com
Filling The Scone Pan
Getting dough into the pan is easy, but a few tricks help:
- Turn dough onto floured surface: Gently shape into a round disk.
- Press into pan: Lift the dough and press it gently into the scone pan. Make sure it fills all corners, but don’t pack too tightly.
- Score the dough: For smooth separation, use a sharp knife or dough scraper to cut along the pan dividers before baking.
- Brush tops: For a golden finish, brush each section with a little cream or milk.
Practical example: If using add-ins like berries, press them evenly so each scone has fruit.
Baking Scones In A Scone Pan
Baking times and temperatures depend on your recipe and pan type.
Standard Baking Instructions
- Preheat oven: Usually 400°F (200°C) for most scones.
- Place pan in center rack: Even heat helps scones rise and brown.
- Bake 18–22 minutes: Scones should be golden and a toothpick comes out clean.
- Cool briefly: Let the pan cool for 5 minutes, then loosen scones with a knife or spatula.
- Remove carefully: Use a thin spatula to lift out each wedge.
Pro tip: For extra crispiness, remove scones from the pan after 5 minutes and cool on a wire rack.
Cleaning And Caring For Your Scone Pan
Proper care keeps your scone pan working for years. Each material has its best practices.
Cleaning Tips By Material
| Material | Cleaning Method | Drying | Seasoning Needed? |
|---|---|---|---|
| Cast Iron | Hand wash with warm water (no soap) | Dry completely, heat to evaporate water | Yes, after each use |
| Aluminum | Dishwasher safe or hand wash | Air dry | No |
| Nonstick Metal | Hand wash gently, avoid abrasives | Air dry | No |
| Silicone | Dishwasher or hand wash | Air dry | No |
Common mistake: Soaking cast iron in water or using harsh soap. This removes seasoning and can cause rust.
Scone Pan Vs. Regular Baking Sheet
You may wonder if you really need a scone pan. Here’s a comparison:
| Feature | Scone Pan | Regular Baking Sheet |
|---|---|---|
| Shape | Perfect triangles | Hand-shaped, may vary |
| Texture | Crispy edges, soft center | Can be uneven |
| Effort | Less shaping needed | More time and tools |
| Cleanup | One pan to wash | Sheet plus knife/cutter |
| Batch size | 6–8 scones | Flexible, but less uniform |
Experience-based tip: If you bake scones often or want neat results, a scone pan is worth it. For large batches or rustic looks, a baking sheet is fine.
Advanced Tips For Perfect Scones
To get bakery-quality scones every time, try these expert tricks:
- Freeze butter: Grate frozen butter for ultra-flaky layers.
- Chill dough before baking: Cold dough rises better and gives a tender crumb.
- Don’t overmix: Stir just until dough forms. Overworking makes tough scones.
- Try add-ins: Mix in orange zest, dried cherries, or herbs for unique flavors.
- Glaze after baking: For a sweet finish, drizzle with simple icing or honey while warm.
- Check oven hot spots: Rotate pan halfway through if your oven bakes unevenly.
Non-obvious insight: You can use a scone pan for other recipes like cornbread, brownies, or even mini cakes. Just adjust the baking time.
Common Mistakes When Using A Scone Pan
Even good bakers make errors. Avoid these:
- Forgetting to grease: Even nonstick pans can stick, especially with rich dough.
- Overfilling sections: Scones can overflow or bake unevenly.
- Underbaking: Thick scones need a bit more time than thin ones. Test with a toothpick.
- Using hot water on cast iron: Causes rust and damages seasoning.
- Not scoring dough: Cutting along pan dividers before baking helps scones separate cleanly.
- Skipping cooling: Removing scones too soon can cause breaking. Wait 5 minutes.
Pro tip: If your scones are pale, brush with cream and bake 2 minutes longer.
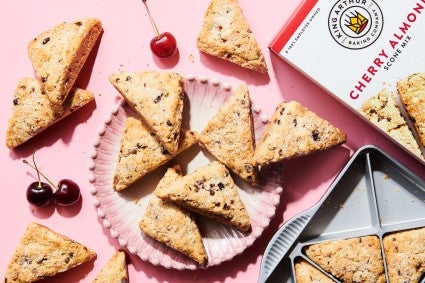
Credit: www.kingarthurbaking.com
Scone Pan Recipes Beyond Basic Scones
A scone pan is not just for scones. Try these ideas:
- Cornbread: Use your favorite recipe, bake until golden.
- Brownie wedges: Pour brownie batter into the pan for easy serving.
- Mini cakes: Bake carrot or spice cake batter for individual treats.
- Savory biscuits: Add cheese, herbs, or bacon to scone dough.
- Shortbread cookies: Press dough into the pan, bake, and cut along lines.
Practical tip: Lower bake time for sweet batters, as sugar browns quickly.
Storing Your Scone Pan
Proper storage keeps pans safe and rust-free.
- Cast iron: Wipe with oil, store in a dry place. Place a paper towel inside to absorb moisture.
- Nonstick/Aluminum: Stack with soft liners between pans to avoid scratches.
- Silicone: Flexible, but keep away from sharp objects.
Experience-based tip: Never store cast iron in a damp cupboard. Humidity causes rust.
Troubleshooting: Scone Pan Problems And Solutions
Scones Stick To The Pan
- Grease pan more generously or re-season cast iron.
Scones Are Too Dry
- Add 1-2 tablespoons extra cream next time.
Uneven Browning
- Try rotating the pan halfway through baking.
Scones Break When Removing
- Let cool longer before lifting out.
Scones Don’t Rise
- Check if your baking powder is fresh. Cold ingredients also help.
Calm expert advice: Keep notes on what works in your kitchen. Small changes matter.
How To Season A Cast Iron Scone Pan
Cast iron pans last for decades if seasoned well. Here’s how:
- Wash and dry pan: Use hot water and a brush (no soap).
- Rub with oil: Vegetable or canola oil works best. Coat all surfaces lightly.
- Bake upside down: Place in a 375°F (190°C) oven, upside down, for one hour. Place foil underneath to catch drips.
- Cool and repeat: For new pans, repeat 2–3 times for best results.
Pro tip: Never use olive oil. It can become sticky or rancid.

Credit: www.amazon.com
Scone Pan Maintenance: Longevity And Best Practices
To keep your pan for years:
- Never use metal utensils on nonstick or silicone pans. Use wood or silicone tools.
- Avoid sudden temperature changes. Don’t put a hot pan under cold water.
- Dry thoroughly. Moisture causes rust in cast iron.
- Re-season regularly. For cast iron, a quick oil wipe after each use keeps it nonstick.
Practical example: Grandparents often pass down cast iron scone pans. With care, yours can last generations.
Scone Pan For Beginners: Tips To Get Started
If you are new, start simple:
- Choose a nonstick or silicone pan. Easier for first timers.
- Use basic recipes first. Master plain scones before adding extras.
- Set a timer. Avoid overbaking.
- Ask for feedback. Friends can help you improve.
- Write down what works. Keep a baking journal.
Non-obvious insight: Baking with kids? Scone pans are safer—no knives needed to cut dough.
Scone Pan For Special Diets
You can use a scone pan for gluten-free, vegan, or low-sugar recipes. Replace flour, butter, or sugar as needed. For best results, use recipes tested for special diets.
Practical tip: Gluten-free dough can be sticky. Use parchment paper or extra oil in the pan.
For more on scone history and recipes, check out Wikipedia.
Frequently Asked Questions
How Do I Keep Scones From Sticking To My Scone Pan?
Grease the pan well with butter or oil, even if it’s nonstick. For cast iron, make sure it’s seasoned. Let scones cool for five minutes before removing to avoid sticking.
Can I Use Parchment Paper In A Scone Pan?
Yes. Cut parchment to fit the sections. It helps with very sticky doughs and makes cleanup easier, especially with sweet or cheesy recipes.
What Else Can I Bake In A Scone Pan?
You can bake cornbread, brownies, mini cakes, shortbread, or savory biscuits. Just adjust baking time based on the batter and check for doneness with a toothpick.
How Do I Know When Scones Are Done?
Scones are golden brown on top and a toothpick in the center comes out clean or with a few crumbs. They should feel firm but not hard.
Is A Scone Pan Dishwasher Safe?
Most aluminum and silicone scone pans are dishwasher safe. Cast iron should never go in the dishwasher. Nonstick pans last longer if washed by hand.
Baking with a scone pan brings professional results to any home kitchen. With the right pan, simple steps, and a few expert tips, you’ll enjoy perfect, uniform scones every time. Happy baking!