If you have deep kitchen cabinets, you already know they can be both a blessing and a curse. On one hand, they offer valuable storage space, especially in smaller kitchens. On the other hand, they can quickly become a black hole—things get lost in the back, food expires without you noticing, and you end up buying duplicates.
If you’ve ever found yourself kneeling on the floor, flashlight in hand, searching for a missing pot, you’re not alone.
Organizing deep kitchen cabinets takes more than just good intentions. It needs a clear strategy, the right tools, and a bit of creativity. In this guide, you’ll discover practical steps to transform your deep cabinets from chaotic to efficient. You’ll learn how to use every inch of space, keep items visible and accessible, and even prevent future mess.
Whether your cabinets are packed with pots, pantry goods, or cleaning supplies, you’ll find solutions that fit your needs. Let’s dive into the secrets of making deep kitchen cabinets work for you.
Why Deep Kitchen Cabinets Get Messy
Deep cabinets seem convenient at first, but their design creates several unique challenges. The main problem is limited visibility—items at the back are hard to see and reach. As a result, it’s easy to push things to the rear and forget about them. Over time, these forgotten items pile up and block access to everything else.
Another issue is inefficient use of space. Because most people store items in a single layer at the front, the back area is wasted. Deep cabinets also lack built-in dividers or organizers, so objects slide around and stack unevenly. Tall or heavy items can topple over, making the space even harder to use.
Finally, there’s the out of sight, out of mind effect. When you can’t see what you own, you’re more likely to overbuy, underuse, or lose track of your inventory. This leads to clutter, wasted money, and frustration.
The Main Types Of Deep Kitchen Cabinets
Before you start organizing, it helps to know what kind of deep cabinet you’re working with. Each type has its own best practices.
| Cabinet Type | Common Location | Typical Use |
|---|---|---|
| Base Cabinet | Below counters | Pots, pans, small appliances |
| Pantry Cabinet | Tall, floor-to-ceiling | Dry goods, bulk food |
| Corner Cabinet | Kitchen corners (often with lazy Susans) | Mixing bowls, baking sheets |
| Utility Cabinet | Near sinks or laundry area | Cleaning supplies, tools |
Knowing your cabinet type helps you choose the right organizers and strategies. For example, a lazy Susan works well in a corner cabinet, but not in a tall pantry.

Credit: www.neathousesweethome.com
Empty And Assess: The First Step
Before you can organize, you need to see what you have. Take everything out of your deep cabinets. Set items on a counter or table. This step can feel overwhelming, but it’s essential for a fresh start.
As you empty the cabinet, group similar items together—pots with pots, baking supplies with baking supplies. Check expiration dates on food and throw away anything expired. For kitchen tools, ask yourself: Do I use this? Do I need more than one? Donate or discard what you don’t need.
Cleaning the empty cabinet is a smart move now—wipe down shelves, vacuum crumbs, and fix any sticky spots. You’ll be surprised how much dust can hide in the depths.
Plan Your Zones And Categories
Deep cabinets work best when every item has a clear home. Planning zones helps you avoid the “just shove it anywhere” habit. Think about your kitchen routines and group items by how you use them:
- Daily Use – Items you reach for every day, like pots, pans, or breakfast cereal. Store these at the front or on a slide-out shelf.
- Occasional Use – Holiday dishes, large stockpots, or specialty gadgets. These can go in the back or on higher shelves.
- Backup Supplies – Extra cans, flour bags, or cleaning products. Keep these in labeled bins at the rear.
- Small Items – Lids, measuring cups, spice packets. Use bins, baskets, or drawer inserts to keep them together.
Labeling each zone makes it easier for everyone in the house to put things back in the right spot.

Credit: www.reddit.com
Choose The Right Organizers For Deep Cabinets
The biggest mistake people make is trying to organize deep cabinets with containers designed for shallow shelves. Deep spaces need organizers that maximize depth, add layers, or bring items forward.
Pull-out Shelves And Drawers
Installing pull-out shelves turns any deep cabinet into easy-access storage. These shelves slide out on rails, bringing everything into view. They’re perfect for pots, pans, and even food containers. While they cost more upfront, they add real value and save your back.
Lazy Susans
A lazy Susan is a round turntable that spins, letting you reach items in hard-to-access corners. It’s especially useful for spices, condiments, and small bottles. For deep corner cabinets, a two-tier lazy Susan uses vertical space too.
Bins And Baskets
Clear bins and baskets act as drawers inside your cabinet. You can pull out a whole bin to reach items in the back. Transparent bins make it easy to see what’s inside. Choose bins that fit the full depth of your cabinet—don’t waste inches at the rear.
Tiered Shelf Risers
Shelf risers create levels so you can stack items and still see everything. They’re perfect for cans, jars, or spice bottles. With risers, nothing gets lost behind a tall item in front.
Vertical Dividers
For baking sheets, cutting boards, and trays, use vertical dividers. These stand items upright, using the cabinet’s height. You’ll avoid messy piles and can grab what you need without shifting everything.
Under-shelf Baskets
Under-shelf baskets hook onto existing shelves, creating bonus layers for storing flat items. They’re great for lids, small cutting boards, or snack pouches.
Drawer Inserts And Trays
For deep drawers, adjustable inserts keep utensils, gadgets, or tea towels in order. Choose trays with adjustable dividers to fit your items.
| Organizer Type | Best For | Common Price Range |
|---|---|---|
| Pull-Out Shelves | Pots, Pans, Appliances | $50 – $200 |
| Lazy Susan | Spices, Bottles, Jars | $10 – $40 |
| Clear Bins | Food, Small Items | $5 – $20 each |
| Shelf Risers | Cans, Jars | $7 – $25 |
| Vertical Dividers | Baking Sheets, Trays | $10 – $30 |
| Under-Shelf Baskets | Lids, Flat Items | $6 – $15 |
Step-by-step: Organizing Deep Kitchen Cabinets
Let’s break the process into simple, actionable steps. Follow these for any deep cabinet, adjusting based on what you’re storing.
1. Measure Your Cabinet
Before buying organizers, measure the width, height, and depth of your cabinet. Write down the numbers. Many organizers look similar online, but a half-inch too wide or tall means they won’t fit.
2. Choose Organizers That Maximize Depth
Pick bins, baskets, or pull-outs that use the full depth. Avoid shallow organizers that leave wasted space at the back. For example, if your cabinet is 24 inches deep, choose a bin at least 20 inches deep.
3. Store Like Items Together
Group similar items in the same bin or section. For example, keep all baking ingredients in one basket and all canned goods in another. This makes it easy to find what you need.
4. Use Labels
Label bins, baskets, and shelves clearly. Use large, easy-to-read labels—masking tape and a marker work fine. This step prevents confusion and keeps your system working over time.
5. Place Frequently Used Items Up Front
Items you use daily should be at the front or on the top of a pull-out shelf. Reserve the back or highest shelf for things you rarely need.
6. Use Vertical Space
If your cabinet is tall, stack items with risers or add an extra shelf. For flat items, store them vertically using dividers.
7. Rotate And Restock
When you buy new supplies, put them at the back. Move older items forward so you use them before they expire. This is especially important in pantry cabinets.
8. Adjust And Refine
After living with your system for a few weeks, adjust as needed. Move things around if you notice a section always gets messy, or if you reach for something often.
Special Tips For Different Cabinet Types
Not all deep cabinets are used the same way. Here are focused strategies for the most common types.
Base Cabinets
These are deep cabinets under your countertop, often used for pots, pans, and appliances. They’re usually 24 inches deep and 30 inches high.
- Install pull-out shelves for heavy cookware. This prevents back strain and keeps everything visible.
- Store lids with vertical dividers or a lid rack mounted to the door.
- For mixing bowls and colanders, use stacking and nest similar shapes to save space.
- Place less-used items (like a roasting pan) at the back or bottom.
Deep Pantry Cabinets
Tall, deep pantry cabinets can quickly become a graveyard for expired food.
- Use clear bins for snacks, baking ingredients, and pasta. You’ll see what’s running low.
- Add tiered risers for canned goods, so each label is visible.
- Store grains and cereals in airtight containers with labels.
- Group by meal type—breakfast items together, baking together, etc.
- Keep a running inventory on the inside of the door for quick checks.
Corner Cabinets
Corner cabinets are tricky because the back area is almost impossible to reach.
- Install a lazy Susan (single or double-tier) to bring items forward.
- For large items, use sliding trays or deep baskets with handles.
- Store rarely used items in the back and everyday items on the turntable.
Utility Cabinets
For cabinets holding cleaning supplies or tools:
- Use bins with handles for sprays, bottles, and rags—easy to pull out.
- Mount hooks or racks on the inside of the door for gloves and brushes.
- Store heavy cleaners at the bottom to avoid spills.
Mistakes To Avoid When Organizing Deep Cabinets
Even with the best intentions, it’s easy to fall into common traps:
- Buying organizers before measuring. Always check your cabinet’s actual size.
- Overfilling bins. If you have to dig through a bin to find something, it’s too full.
- Ignoring vertical space. Use risers or add shelves to avoid stacking too much.
- Not labeling. Even clear bins can become confusing if not labeled.
- Storing heavy items up high. This can be dangerous—keep them low and accessible.
Non-obvious Insights For Deep Cabinet Success
Most people focus only on the inside of the cabinet, but doors offer valuable real estate. Mount slim racks or magnetic strips on the inside for spices, utensils, or cleaning brushes. This is especially helpful in small kitchens.
Another overlooked tip: leave some empty space. It’s tempting to fill every inch, but leaving room makes it easier to return items and adjust for new purchases. A little “breathing room” helps your system stay flexible.
How To Keep Your System Working
Organizing once is great, but the real challenge is keeping it that way. Make it a habit to:
- Return items to their correct bin or spot after use.
- Check for expired or unused items every few months.
- Involve everyone in your household—show them the system and labels.
Set a reminder on your calendar every six months for a quick cabinet checkup. Regular maintenance prevents clutter from sneaking back.
When To Upgrade Your Cabinets
Sometimes, no matter how well you organize, your cabinets just don’t work for your needs. Consider upgrades if:
- You can’t reach items even with organizers.
- Shelves are damaged or sagging.
- You want a more accessible kitchen for aging-in-place.
Professional solutions like custom pull-outs, soft-close hardware, or even new cabinetry can transform your space. These upgrades add value to your home and make daily life easier.
To learn more about kitchen cabinet design and ergonomics, visit the National Kitchen & Bath Association for detailed guidelines.
Real-life Examples: Before And After
Sometimes, seeing is believing. Here are two examples of deep cabinet makeovers:
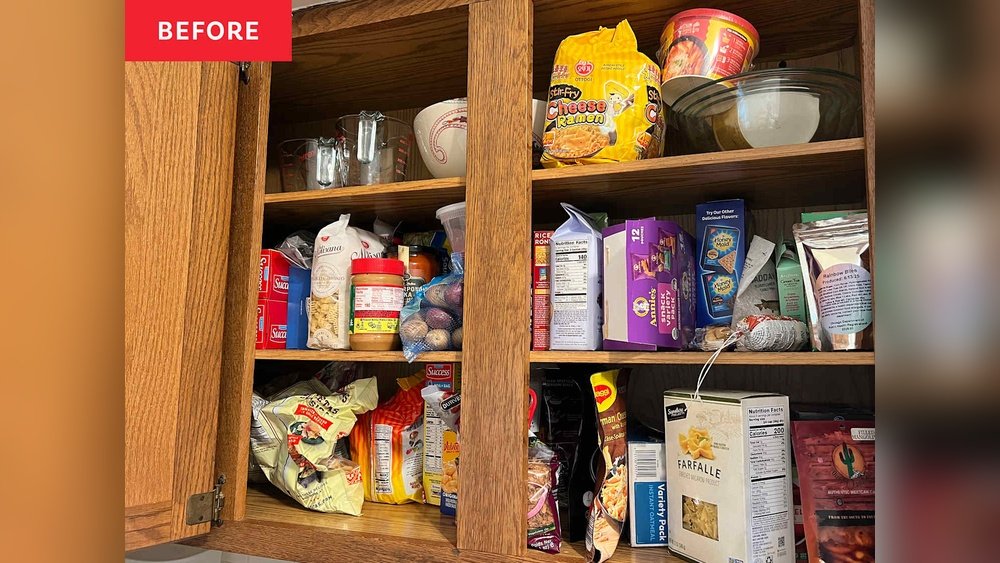
Case 1: The Pantry Transformation
Before: A tall pantry cabinet was overflowing with half-used pasta bags, expired cans, and rarely used appliances buried in the back. The owner couldn’t see what food they had and wasted money on duplicates.
After: The pantry was emptied, cleaned, and refitted with clear bins for snacks, baskets for bread, and tiered risers for canned goods. Labels were added to each section. Now, every item is visible, and weekly shopping is faster and cheaper.
Case 2: The Base Cabinet Rescue
Before: Heavy pots and pans were stacked on top of each other in a deep base cabinet, making it hard to cook without a balancing act. Lids were scattered everywhere.
After: Two pull-out shelves were installed—one for pots, one for pans. A vertical divider held lids upright. The owner can now grab what they need without digging or noise.
How Deep Cabinet Organization Saves You Time And Money
Organizing deep cabinets isn’t just about looks. It also:
- Reduces food waste by keeping items visible and accessible.
- Saves money by preventing duplicate purchases.
- Speeds up cooking because you can quickly find tools and ingredients.
- Reduces stress by making your kitchen feel calm and under control.
According to a 2022 study by the National Kitchen & Bath Association, organized kitchens improve daily efficiency by up to 30%. That’s more time for what matters most.
Comparison: Deep Cabinets Vs. Shallow Cabinets
To help you understand the unique challenges and benefits, here’s a side-by-side look:
| Feature | Deep Cabinets | Shallow Cabinets |
|---|---|---|
| Storage Capacity | High (can hold large items) | Lower (best for small items) |
| Visibility | Low (items get hidden in back) | High (everything easy to see) |
| Access | Harder (needs organizers) | Easier (quick grab) |
| Best Use | Pots, pans, bulk storage | Spices, plates, small tools |
This shows why deep cabinets need extra planning, but also offer great potential.

Credit: www.neathousesweethome.com
Frequently Asked Questions
How Do I Keep Food From Getting Lost In The Back Of A Deep Pantry Cabinet?
Use clear bins and tiered shelf risers to keep food visible. Group similar items together, and label bins. Rotate food when restocking—put new items in the back so older ones get used first.
What’s The Best Way To Store Pot Lids In A Deep Cabinet?
Install a vertical divider or a lid rack inside the cabinet door. You can also use an under-shelf basket for lids. This prevents stacking and makes each lid easy to grab.
Are Pull-out Shelves Worth The Investment?
Yes, for most people. Pull-out shelves make deep cabinets easy to use, reduce back strain, and prevent lost items. They are especially helpful for heavy cookware or appliances.
Can I Organize Deep Cabinets Without Buying Expensive Organizers?
Absolutely. Use sturdy cardboard boxes as bins, repurpose baskets, or add DIY dividers from scrap wood. The key is grouping like items and keeping them accessible.
How Often Should I Reorganize My Deep Kitchen Cabinets?
Plan to check your cabinets every six months. Remove expired items, adjust organizers if needed, and make sure everything is still easy to reach. Regular maintenance keeps your system working.
Deep kitchen cabinets can be your kitchen’s greatest asset if you organize them well. With the right tools, smart strategies, and a little upkeep, you’ll enjoy a clutter-free, efficient kitchen that saves you time, money, and stress. Try these steps and enjoy the difference every time you cook or clean.