Seasoning a wok is more than just a cooking step—it’s a tradition that connects you to centuries of Asian cuisine. If you own a wok with wooden handles, you already have a tool that can last for generations. But without proper seasoning, your wok may rust, food may stick, and your meals could lack that signature smoky flavor known as “wok hei.” Many home cooks feel nervous about seasoning, especially when their wok has wooden handles. They worry about damaging the wood, or aren’t sure which oil to use, or how many times to repeat the process. The good news is: seasoning a wooden-handled wok is safe, simple, and rewarding if you follow the right steps.
This guide will walk you through everything you need to know. You’ll learn why seasoning matters, how it protects your wok, and how to do it at home with tools you already have. We’ll cover the best oils, the right heat, how to care for the wooden handles, and what to do if something goes wrong.
With clear instructions, real-world tips, and answers to common questions, you’ll finish with a wok that’s ready for anything—from fried rice to stir-fries and more.
Why Seasoning A Wok Matters
A brand-new wok may look shiny and perfect, but it’s not ready to cook yet. Most new woks, especially carbon steel and cast iron, have a thin oil coating from the factory to stop rust. This coating is not for cooking. Seasoning replaces this factory oil with a natural, non-stick layer that protects your wok and improves flavor.
Seasoning means heating oil until it bonds to the metal. This forms a black or dark brown surface, called a patina. Each time you cook, the patina grows stronger. The more you use your wok, the better it gets—if you season it well in the beginning.
Two key things happen when you season a wok:
- Non-stick surface: Oil fills tiny holes in the metal, so food doesn’t stick.
- Rust protection: A seasoned wok resists moisture and rust.
A well-seasoned wok also adds depth to your dishes. Many chefs believe that the best wok flavor comes from years of cooking and seasoning, layer after layer.
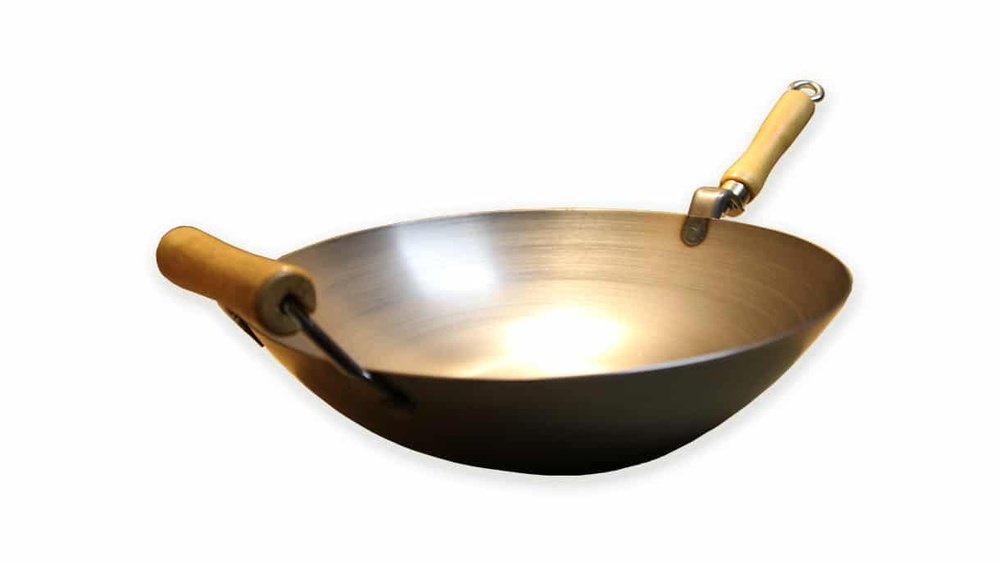
Understanding Wooden Handles
A wok with wooden handles is designed for easy handling. The wood stays cool, so you can move and toss food without burning your hands. However, wood can burn, crack, or dry out if exposed to too much heat or moisture.
Before seasoning, it’s important to understand these facts about wooden handles:
- Most wooden handles are attached with screws or rivets.
- Some can be removed before seasoning, but most are built to stay on.
- Wood can absorb oil and water, so care is needed during cleaning and seasoning.
Many home cooks worry about damaging the wood. In reality, with a little protection and attention, your wooden handles will last as long as the wok itself.
Preparing Your Wok For Seasoning
Getting your wok ready is an important first step. Skipping this can lead to uneven seasoning or sticky food later.
Removing Factory Coating
Most new woks have a thin layer of oil or wax. This is not food-safe for cooking. You need to remove it completely.
- Scrub with soap: Use a steel scrubber or stiff sponge with hot water and dish soap. Scrub all surfaces, inside and out.
- Focus on edges: Don’t forget the rim and the area around the handles.
- Rinse well: Make sure no soap or residue is left behind.
- Dry completely: Use a towel, then heat the wok over low heat to evaporate any water.
Some woks may have a blue or black coating (called “factory seasoning”). Still, it’s best to wash thoroughly before your own seasoning.
Protecting Wooden Handles
Wooden handles should not get soaked or baked at high temperatures. To protect them:
- Wrap each wooden handle tightly with a damp cloth and then a layer of aluminum foil. This keeps the wood from drying or scorching during oven or stovetop seasoning.
- If the handles are removable (check your brand), you can unscrew them for seasoning. Most are not designed to be removed, so do not force them.
Pro tip: If your wok has a wooden side helper handle, wrap it too—even if it looks small.
Checking For Factory Defects
Before you start, inspect your wok for:
- Loose handles
- Cracks in the wood
- Sharp edges on the metal
Tighten screws if needed. A solid wok is safer and seasons better.
Choosing The Best Oil For Seasoning
Not all oils are good for seasoning. The best oils are those with a high smoke point—meaning they can get very hot without burning.
Great choices:
- Flaxseed oil (very high smoke point, creates hard layers)
- Grapeseed oil
- Canola oil
- Sunflower oil
- Peanut oil
- Soybean oil
Avoid butter, olive oil, or coconut oil. These can burn or leave sticky layers.
A little oil goes a long way. You only need enough to coat the surface with a thin, even layer.
Here’s a quick comparison for reference:
| Oil Type | Smoke Point (°F) | Hardness of Seasoning | Recommended for Wok? |
|---|---|---|---|
| Flaxseed Oil | 450 | Very hard | Yes |
| Canola Oil | 400 | Hard | Yes |
| Olive Oil | 350 | Soft/Sticky | No |
| Peanut Oil | 450 | Hard | Yes |
Seasoning Methods: Stovetop Vs Oven
There are two main ways to season a wok with wooden handles:
- Stovetop seasoning (preferred for woks with wooden handles)
- Oven seasoning (possible, but requires extra care)
Let’s look at both.
Stovetop Seasoning
Stovetop seasoning is the classic method. It works well for most home kitchens and avoids overheating the wooden handles.
Steps For Stovetop Seasoning
- Ventilate your kitchen: Open windows, turn on fans, or use your range hood. Seasoning can get smoky.
- Heat the wok: Place the dry wok on your largest burner. Turn the heat to high. Move the wok around to expose all surfaces to the flame. The color will change—this is normal.
- Apply oil: Once the wok is hot, use tongs to hold a paper towel dipped in oil. Wipe the inside surface with a thin, even layer.
- Burn the oil in: Keep heating until the oil begins to smoke. You’ll see the surface darken. Tilt and rotate the wok so every part gets hot.
- Repeat: Let the wok cool slightly, then add another thin layer of oil. Heat again until smoking. Repeat 3–5 times for best results.
Tip: Do not let oil pool at the bottom. Too much oil causes sticky spots.
Oven Seasoning (with Caution)
Most ovens can fit a wok, but wooden handles are at risk. Only use this method if you can protect the wood and your manufacturer says it’s safe.
Steps For Oven Seasoning
- Wrap handles: Double-wrap wooden handles with wet cloths and several layers of foil.
- Preheat oven: Set to 450°F (230°C).
- Oil the wok: Rub a thin coat of oil inside and out.
- Bake: Place the wok upside down on the oven rack (with a tray underneath for drips). Bake for 20 minutes.
- Cool and repeat: Let cool, then wipe more oil and repeat 2–3 times.
Warning: If you smell burning wood, stop and check the handles immediately.
Step-by-step Guide: Seasoning A Wok With Wooden Handles
Now, let’s combine the above advice into a detailed, foolproof process. This method assumes you’re using the stovetop, which is safest for wooden handles.
What You Need
- New carbon steel or cast iron wok with wooden handles
- Dish soap and scrubber
- Paper towels or lint-free cloths
- High smoke point oil (flaxseed, canola, etc.)
- Tongs or chopsticks
- Aluminum foil and damp cloths (for handle protection)
- Stove with a strong burner
- Heat-resistant gloves
Step 1: Wash And Dry
Scrub your new wok under hot water with dish soap. Remove all factory oil or wax. Pay attention to the area near the handles. Rinse well, then dry completely with a towel and gentle heat.
Step 2: Protect The Wooden Handles
Wrap each wooden handle tightly with a damp cloth. Cover with aluminum foil. Make sure no wood is exposed.
Step 3: Heat The Wok
Place the dry wok on your largest burner. Heat on high until the metal starts to change color—bluish, golden, or even dark gray. Move the wok around so every surface gets direct heat. Use gloves for safety.
Step 4: Apply Oil
Turn off the heat for a moment. Dip a paper towel into your chosen oil. Use tongs or chopsticks to rub a thin layer of oil over the entire inside surface. Wipe off any excess—less is more.
Step 5: Burn In The Oil
Turn the burner back on high. Heat the oiled wok until it smokes. Rotate and tilt the wok so every part gets hot. As the oil burns in, you’ll see the surface darken and become shiny.
Step 6: Repeat The Process
Let the wok cool for a few minutes. Then, add another thin layer of oil and repeat the heating and smoking step. Do this 3 to 5 times for the best patina.
Step 7: Cool And Remove Protection
When finished, let the wok cool to room temperature. Carefully remove the foil and cloth from the handles.
Step 8: Ready To Cook
Your wok is now seasoned. The inside should be dark, smooth, and slightly shiny. You’re ready to cook!
Extra tip: The first few dishes should be stir-fried vegetables or fried rice—avoid acidic foods (like tomatoes or vinegar) at first, as these can damage the new seasoning.
Troubleshooting Common Problems
Even with care, things sometimes go wrong. Here’s how to fix common seasoning issues:
Sticky Or Gummy Coating
If your wok feels sticky after seasoning, you probably used too much oil or didn’t heat it enough.
Solution: Scrub the sticky area with hot water and a soft brush. Dry, then repeat the seasoning with less oil.
Uneven Color
It’s normal for a new wok to look patchy after the first seasoning. With use, the color will even out.
Solution: Keep cooking! As you use your wok, the patina will become smoother and more even.
Rust Spots
If you see rust, it means the metal was exposed to water or the seasoning layer was too thin.
Solution: Scrub off the rust, dry well, and repeat seasoning.
Burned Or Cracked Wood
If the handles get too hot, they may dry out or crack.
Solution: Always wrap handles well before heating. If cracks appear, you can sand lightly and apply food-safe mineral oil to restore moisture.
Non-obvious insight: Many people think the first seasoning must look perfect. In reality, even professional chefs have woks with spots and streaks at first. What matters is the protective layer—the color will improve with every meal.
Caring For Your Seasoned Wok
A well-seasoned wok needs gentle care to keep its patina strong.
Cleaning After Cooking
- Don’t use soap unless absolutely necessary.
- Rinse with hot water and a soft brush or bamboo wok brush.
- Dry over low heat to remove all moisture.
- Rub a drop of oil on the inside after every wash.
Storing Your Wok
Store your wok in a dry place. Do not stack heavy pots inside it. If you live in a humid area, check for rust often and wipe with oil as needed.
Protecting Wooden Handles Long-term
- Never soak wooden handles in water.
- If handles get dry, rub with food-safe mineral oil.
- Tighten any loose screws regularly.
Comparing Seasoned Vs Unseasoned Woks
Understanding the difference helps you appreciate the value of seasoning.
| Feature | Unseasoned Wok | Seasoned Wok |
|---|---|---|
| Non-Stick Ability | Poor (food sticks) | Excellent (food slides off) |
| Rust Resistance | None (rusts quickly) | High (resists rust) |
| Flavor Contribution | Neutral | Deep, smoky flavor |
| Ease of Cleaning | Hard (scrubbing needed) | Easy (just rinse) |
| Longevity | Shorter (wears out) | Very long (improves with age) |
Advanced Tips For Experienced Cooks
If you want to take your wok seasoning to the next level, try these ideas:
- Use vegetable scraps: After initial seasoning, fry green onion tops, ginger, or garlic in oil. This helps build flavor and remove any last metallic taste.
- Stir-fry at high heat: Cooking at high heat helps the patina grow. The more you use your wok, the better the surface becomes.
- Avoid boiling water: Boiling in your wok can strip the seasoning. If you must, re-oil and heat after.
Non-obvious insight: Professional chefs often have more than one wok—one for stir-frying, and another for deep-frying or steaming. This keeps the best patina for high-heat dishes.
When To Reseason Your Wok
Sometimes, you need to reseason your wok. This can happen if:
- The wok is rusty or scratched
- Food starts sticking badly
- You accidentally scrubbed off the seasoning
To reseason, repeat the washing, drying, and seasoning steps as above. Each wok can be restored many times.
Seasoning Myths And Mistakes
Many home cooks hear conflicting advice about wok care. Let’s clear up some common myths:
- Myth: “You should never use soap.” Truth: It’s okay to use soap the first time you wash a new wok, or if it’s very dirty. Just rinse well and re-oil after.
- Myth: “Seasoning is a one-time job.” Truth: Seasoning improves with use. Every time you cook, you add to the patina.
- Myth: “Only lard or animal fat works.” Truth: Many plant oils are great for seasoning, and they’re healthier.

Credit: www.marionskitchen.com
The Science Behind Seasoning
When you heat oil on the wok’s surface, it goes through a process called polymerization. The oil molecules bond to the metal and to each other, forming a hard, plastic-like layer. The hotter the oil gets (without burning), the stronger this layer becomes.
Different oils create different hardness and color. Flaxseed oil, for example, creates a very hard but brittle layer. Canola oil is more flexible but still durable. What matters most is using thin layers and enough heat.
Real-world Example: A Wok’s First Year
Let’s follow a typical wok’s journey.
- First month: The wok is black in some places, brown in others. Food sticks a little at first, but less each time.
- Three months: The patina is mostly even. Stir-fries cook quickly and taste smoky.
- One year: The wok is jet black and glossy. Food never sticks. The handles are smooth and comfortable. The wok feels like an extension of your hands.
Many chefs say their favorite wok is the one they’ve owned for years. Seasoning is what makes this possible.

Credit: www.amazon.com
Why Wok Seasoning Is Different From Other Pans
Woks are unique because of their shape and usage:
- The round bottom means oil flows and coats evenly.
- High heat is essential for stir-frying.
- The patina adds flavor—something that doesn’t happen with stainless steel or non-stick pans.
A wok with a good seasoning can handle anything—stir-fries, steaming, deep-frying, and even popcorn.
Health And Safety Tips
Seasoning is safe when done right. Here’s how to protect your kitchen and your health:
- Always season in a well-ventilated area. Burning oil can create smoke.
- Use tongs or gloves to avoid burns.
- Do not leave the wok unattended during high heat.
- Choose food-safe oils only.

Credit: www.reddit.com
Resource For Further Reading
If you want to learn more about wok history, seasoning science, or advanced techniques, visit the Wikipedia Wok Page for more details.
Frequently Asked Questions
How Often Should I Season My Wok With Wooden Handles?
After the first seasoning, you don’t need to repeat the full process unless food starts sticking or the patina wears off. For most people, seasoning once and then cooking regularly is enough. If you notice rust or patches, reseason just those areas.
Can I Use The Oven Method If My Wok Has Wooden Handles?
It’s possible, but extra care is needed to protect the wood. Always wrap the handles with damp cloth and aluminum foil. Check your manufacturer’s instructions—some brands advise against oven seasoning for wooden-handled woks.
What Foods Should I Cook First After Seasoning My Wok?
Start with high-heat stir-fried vegetables or fried rice. Avoid acidic foods (like tomatoes or vinegar) for the first 5–10 uses. Acidic ingredients can strip the new seasoning.
What If My Wooden Handles Become Loose?
Handles can loosen over time from heat and use. Tighten any screws with a screwdriver. If the handle is glued and comes off, consult the manufacturer or use high-temperature food-safe glue.
Why Does My Seasoned Wok Look Uneven Or Spotted?
This is normal for new woks. The color will even out as you cook. Each dish adds to the patina, making it smoother and darker. Uneven spots do not affect cooking performance.
Seasoning your wok is an investment in great cooking and long-lasting tools. With patience and these steps, your wok with wooden handles will become the heart of your kitchen—ready for any dish, any night, for years to come.