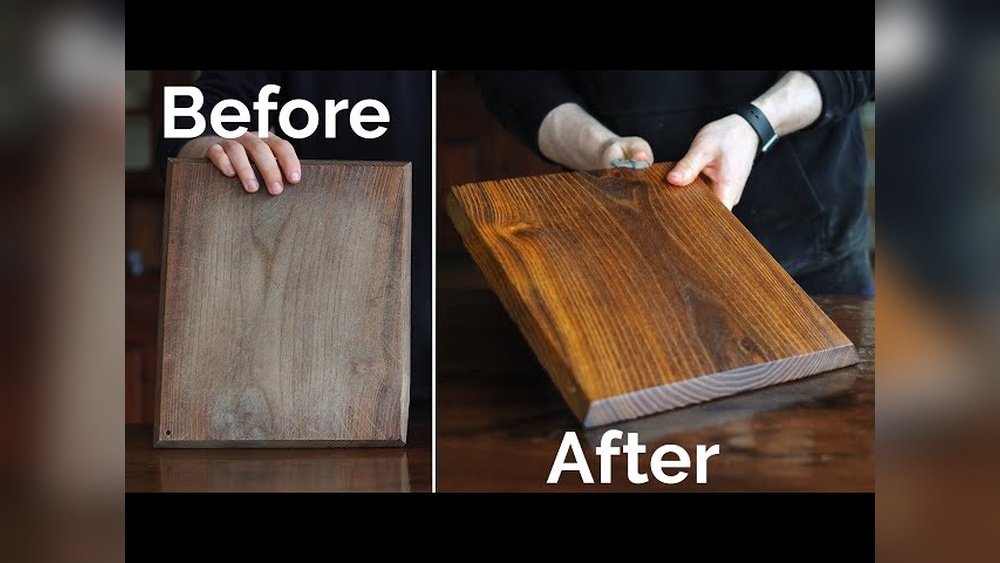
Staining and sealing a cutting board is not just about looks. It’s about protecting your board, keeping food safe, and making your kitchen tools last longer. Many people use their cutting boards every day but don’t realize how easy it is to keep them in great shape with the right staining and sealing.
Doing this yourself can save money, prevent bacteria, and even make your board more beautiful. Whether your board is brand new or has been in your family for years, this guide will walk you through everything step by step.
If you’ve never stained or sealed wood before, don’t worry. You don’t need special skills or expensive tools. With a bit of time and care, you can turn any wooden board into something that looks good and works even better.
You’ll also learn how to avoid mistakes that can ruin a cutting board or make it unsafe for food. Let’s get started on making your kitchen both safer and more stylish.
Why Stain And Seal A Cutting Board?
A cutting board faces a lot of use—knife cuts, water, food juices, and sometimes even the dishwasher (though it shouldn’t!). Over time, this can damage the wood, making it dry, rough, or even cracked. Staining and sealing your board helps protect it in several ways:
- Prevents cracks and warping: Sealing stops water from soaking into the wood, which can cause swelling or shrinking.
- Blocks bacteria: A sealed surface keeps food and juices from soaking in, reducing the risk of germs.
- Makes cleaning easier: Stains and oils create a smoother surface, so food doesn’t stick.
- Improves appearance: Stains can highlight the natural beauty of the wood grain, making your board look new again.
Many people miss that not all stains and sealers are safe for food. Using the wrong product can make your board unsafe to use. Also, skipping maintenance means you’ll replace your board more often.
What You’ll Need: Tools And Materials
Getting the right supplies is half the battle. Here’s what you need before starting:
Essential Materials
- Cutting board: New or old, but must be real wood (not bamboo, plastic, or glass).
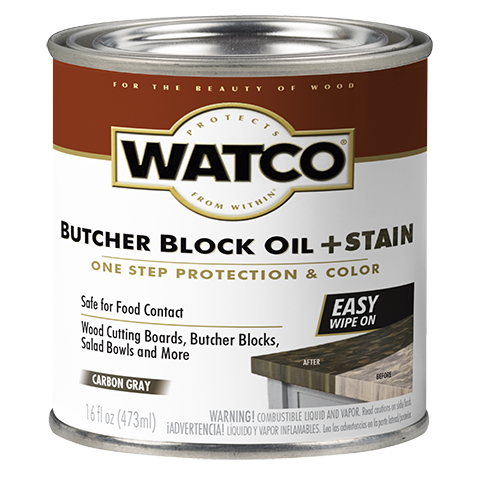
- Food-safe stain (optional): Choose if you want to change the color.
- Food-grade mineral oil: Seals the board and keeps it hydrated.
- Beeswax or board cream: Adds a protective finish and shine.
Necessary Tools
- Sandpaper: Medium (120 grit), fine (220 grit), and very fine (320 grit) for smoothing the board.
- Clean rags or lint-free cloths: For applying oil and stain.
- Disposable gloves: Protect your hands from stains and oils.
- Small brush: For applying stain in tight corners.
- Mild soap and water: For cleaning before you start.
Optional Extras
- Painter’s tape: To mask off areas you don’t want stained.
- Wood filler: If your board has deep knife marks or cracks.
- Plastic scraper: To remove old food or wax buildup.
Many beginners don’t realize that using food-grade mineral oil is the safest way to seal a board used for food. Other oils can turn rancid or become sticky.
Credit: www.rustoleum.com
Preparing The Cutting Board
Before you stain or seal, you need to prepare the wood. This is where most people make mistakes—starting on a dirty or rough board means the finish won’t last.
Step 1: Clean The Board
Wash the board with mild soap and warm water. Scrub gently with a soft sponge, and rinse well. Never soak your board or put it in the dishwasher—this can cause warping.
For old boards with stains or odors, sprinkle coarse salt on the surface, rub with half a lemon, and rinse. Let the board dry completely before the next step.
Step 2: Sand The Surface
Sanding removes knife marks, stains, and old finish. Start with 120-grit sandpaper to smooth rough spots. Sand with the grain (not against it). Move to 220-grit for a finer finish, and finish with 320-grit for a silky surface.
Wipe off all dust with a damp cloth. Even tiny dust particles can ruin a smooth finish.
Step 3: Fix Cracks Or Deep Cuts
If your board has deep cuts, use food-safe wood filler. Fill the cracks, let it dry, and sand smooth. Do not use regular wood glue or filler, as these are not food safe.
Choosing The Right Stain
Not all stains are safe for cutting boards. Some contain chemicals that are unsafe for food contact.
Types Of Stain
- No Stain (Natural Look): Many people prefer to keep the natural color. This is the safest and most common choice.
- Food-Safe Stains: These are usually made from natural oils and pigments. Look for products labeled as “food-safe” or “non-toxic after curing.”
- DIY Natural Stains: You can use coffee, tea, or beet juice for a mild color change. These fade faster but are 100% safe.
Some beginners try to use hardware store stains meant for furniture—these are not safe. Always check the label or buy from a kitchen supply store.
When To Stain
- If you want a darker or richer color: Staining is a good choice.
- If your board is very old or faded: A stain can restore its look.
- If you love the natural look: Skip stain and go straight to sealing.
How To Apply Stain To A Cutting Board
If you choose to stain, follow these steps carefully:
Step 1: Test The Stain
Always test on the bottom or a hidden area first. Some woods absorb stain unevenly. Wait 24 hours to see the true color.
Step 2: Apply The Stain
Put on gloves. Use a clean cloth or small brush to apply a thin, even layer of stain. Wipe off extra stain after 5–10 minutes. The longer you leave it, the darker it will be.
Step 3: Let It Dry
Let the stained board dry for at least 24 hours. Place it in a well-ventilated area, away from food and kids.
Step 4: Lightly Sand (optional)
If the grain feels rough after staining, sand lightly with 320-grit paper. Wipe away dust before sealing.
It’s important not to rush. If the stain is not fully dry, the seal won’t work well and may trap smells.
Choosing The Best Cutting Board Sealer
Sealing is the most important part of the process. It keeps the board safe and strong.
Common Sealers For Cutting Boards
| Sealer Type | Food Safety | Durability | Common Use |
|---|---|---|---|
| Mineral Oil | Food Safe | Medium | Most popular |
| Beeswax | Food Safe | High | Added shine/protection |
| Coconut Oil (refined) | Food Safe | Medium | For vegan boards |
| Walnut Oil | Food Safe (check for allergies) | Medium | Natural finish |
| Linseed Oil (raw) | Food Safe | Medium | Traditional boards |
Mineral oil is the top choice for most people. It’s cheap, easy to find, and doesn’t go bad like some vegetable oils. Avoid using olive oil, vegetable oil, or butter—they can turn rancid and make your board smell.
Beeswax is often used after mineral oil for extra protection and shine.
How To Seal A Cutting Board: Step-by-step
Sealing is simple, but there are a few tricks that make it last longer.
Step 1: Warm The Board (optional)
Warming the board (in a sunny spot or with a hairdryer) opens the wood pores. This lets oil soak in deeper. Do not overheat—just slightly warm.
Step 2: Apply Mineral Oil
Pour a small amount of food-grade mineral oil onto the board. Use a clean cloth to spread it evenly, covering all sides and edges. Let the oil soak in for at least 4–6 hours (overnight is better).
Step 3: Wipe Off Excess
After soaking, wipe off any extra oil. The board should feel soft, not greasy.
Step 4: Apply Beeswax (optional)
Rub a small amount of beeswax or board cream over the surface. Buff with a clean cloth until the board is shiny and smooth.
Step 5: Repeat For Best Results
New boards should be oiled three to four times in the first week. After that, oil once a month, or whenever the board looks dry.
Many people don’t realize that sealing the sides and bottom is just as important as the top. This prevents uneven moisture and warping.
Comparing Sealers: Which Is Best?
Let’s compare how common sealers perform:
| Product | Price (per 8 oz) | Odor | Lasts (months) | Food Safe |
|---|---|---|---|---|
| Mineral Oil | $5–$7 | None | 1–2 | Yes |
| Beeswax Cream | $7–$10 | Faint honey | 2–3 | Yes |
| Coconut Oil | $6–$9 | None | 1–2 | Yes |
| Walnut Oil | $8–$12 | Nutty | 1–2 | Yes, allergy risk |
| Linseed Oil | $8–$11 | Earthy | 1–2 | Yes |
The main lesson: mineral oil is the best all-around choice for most people.
Maintenance After Staining And Sealing
Sealing your board is not a one-time job. Here’s how to keep your board in great shape:
- Clean after each use: Wipe with a damp cloth and mild soap. Rinse and dry right away.
- Re-oil monthly: If the board looks dull, dry, or rough, oil it again.
- Don’t soak or put in dishwasher: Water and heat can ruin the seal.
- Buff with wax for shine: Every few months, rub with beeswax or board cream.
- Sand and re-seal as needed: If the surface gets rough or stained, sand lightly and repeat the oil/wax steps.
A common mistake is waiting too long between oilings. If water no longer beads on the surface, it’s time to re-seal.
Common Mistakes And How To Avoid Them
Many first-timers make the same errors. Here’s how to avoid them:
Using The Wrong Oil
Avoid olive, vegetable, or other cooking oils—they go rancid and smell bad. Only use food-grade mineral oil, coconut oil, or beeswax.
Skipping The Sides And Bottom
Always seal all surfaces, not just the top. This prevents moisture from entering and warping the board.
Not Letting Products Dry
If you don’t let stain or oil dry fully, the board can become sticky or attract dust. Be patient.
Using Unsafe Stains
Never use hardware store stains or polyurethane on a cutting board. These are not food safe and can be toxic.
Not Sanding Enough
If you don’t sand between steps, the finish won’t be smooth, and oil won’t soak in properly.
Over-oiling
Too much oil can make the board feel greasy. Use a thin layer and wipe off excess.
Credit: community.glowforge.com
How Often Should You Stain And Seal?
- Stain: Most boards do not need staining more than once, unless you want to change the look.
- Seal (oil): Oil once a month, or more often if the board looks dry.
- Wax: Every 2–3 months, or when the board loses its shine.
High-use boards may need oiling more often.
Quick Reference: Complete Staining & Sealing Process
Here’s a fast overview for review:
- Clean and dry the board.
- Sand with 120, then 220, then 320 grit.
- Wipe off dust.
- Test stain on small area (if using stain).
- Apply stain, wait 24 hours.
- Sand lightly, remove dust.
- Apply mineral oil, let soak overnight.
- Wipe off excess oil.
- Apply beeswax, buff to shine.
- Let cure 12–24 hours before using.

Credit: www.woodcraftblueprint.com
Safety And Food Hygiene Tips
A well-sealed cutting board is safer for preparing food, but you should still:
- Use separate boards for raw meats and vegetables.
- Wash the board after each use.
- Avoid using the same board for strong-smelling foods (like garlic) and fruit.
- Store boards upright to allow air flow and prevent mold.
For more details on wood safety, see the official USDA food safety guide.
When To Replace Your Cutting Board
Even with good care, all boards wear out. Replace your board if:
- It has deep cracks you cannot sand out.
- The wood is warped or split.
- It smells bad even after washing.
- You see black spots (signs of mold inside the wood).
A well-cared-for board can last 10 years or more. But safety comes first.
Real-life Example: Staining And Sealing A Family Heirloom Board
Imagine you have an old maple board from your grandmother. It’s dull, scratched, and faded, but you want to save it.
- Clean with soap and lemon-salt scrub.
- Sand deep knife marks with 120 grit, then smooth with 220 and 320.
- Test a walnut oil stain on the edge; decide it looks good.
- Apply stain, wait a full day.
- Oil three times with mineral oil over a week.
- Finish with beeswax cream for shine.
In a few days, the board looks almost new, with deep wood grain and a smooth, food-safe finish—ready for the next generation.
Frequently Asked Questions
How Long Does It Take To Stain And Seal A Cutting Board?
The whole process can take 2 to 3 days. Staining requires at least 24 hours to dry, and each oiling step should soak in for several hours. Most of the time is waiting, not working.
Can I Use Regular Wood Stain Or Polyurethane?
No. Regular wood stains and polyurethane are not food safe. They contain chemicals that can leach into food. Only use products labeled food safe.
How Do I Know When My Board Needs Oiling?
If the surface looks dry, dull, or rough, or if water stops beading on the surface, it’s time to oil. High-use boards may need oil every few weeks.
What’s The Difference Between Oiling And Waxing?
Oiling soaks into the wood to keep it from drying out. Waxing adds a protective top layer that makes the board shine and helps water bead off. Both together give the best protection.
Is It Safe To Use Colored Stains On A Cutting Board?
Only use food-safe stains or natural colorings (like coffee or tea). Most colored stains from hardware stores are not safe for food contact. Always check the label.
A cutting board is more than just a tool—it’s part of your kitchen’s heart. With the right care, you can keep your board looking and working its best for years. Staining and sealing may take a bit of time, but the results are worth it.
Your food stays safer, your board lasts longer, and your kitchen looks better. Now that you know how to stain and seal a cutting board, you’re ready to give new life to any piece of wood in your kitchen.