
Drying fresh oregano in the oven is more than a kitchen trick—it’s a way to capture the essence of summer and bring it to your dishes all year long. The process is simple, but there are hidden details that can turn a good batch into a great one.
Many home cooks don’t realize that oven-dried oregano often tastes better and is more aromatic than store-bought versions. You also gain control over quality and flavor, avoiding additives and maximizing freshness.
This guide will take you through every step of drying oregano in the oven, from harvesting at the right moment, to storing the finished product for maximum shelf life. Along the way, you’ll get tips, comparisons, and common mistakes to avoid.
Whether you’re a beginner or an experienced cook, you’ll find practical advice to get the best results every time. You might also discover a few techniques that even seasoned cooks overlook, making your dried oregano truly stand out in your kitchen.
Why Dry Oregano In The Oven?
Fresh oregano is wonderful, but it spoils quickly. Drying is one of the oldest methods to preserve herbs. Oven drying gives you several advantages:
- Speed: Oven drying is much faster than air drying. You can process a large harvest in less than an hour.
- Consistency: The oven gives you a controlled environment, so your oregano dries evenly.
- Safety: Rapid drying means less chance for mold or bacteria to grow.
In addition, dried oregano has a different flavor profile. The essential oils become concentrated, making the herb even more fragrant and robust. Many Italian and Mediterranean recipes actually call for dried oregano because of this stronger taste.
Another benefit is flexibility. With oven drying, you don’t have to rely on weather conditions, which can be a big problem if you live in a humid or rainy climate. Inconsistent temperatures and moisture outdoors can lead to spoiled herbs.
The oven lets you dry oregano any day of the year, regardless of the weather.
One detail often missed: oven drying also helps retain a brighter color compared to some other methods. If done carefully, you’ll notice your dried oregano has a fresher green look, not the dull brownish tint sometimes seen in store-bought jars.
Choosing The Best Oregano For Drying
Not all oregano is the same. There are several varieties, but the two most common are Origanum vulgare (common oregano) and Origanum heracleoticum (Greek oregano). Greek oregano is considered the most flavorful for cooking.
When selecting oregano to dry, look for these signs:
- Healthy leaves: Leaves should be green, with no yellowing or brown spots.
- No flowers: Pick oregano before it starts to flower, when the oils are strongest.
- No pesticides or sprays: If possible, use homegrown or organic oregano.
If you’re buying oregano from a store or market, ask if it’s been sprayed. Washing will remove surface dirt, but some residues can stay.
One extra tip: If you grow your own oregano, don’t fertilize just before harvest. Too much fertilizer can make the leaves less flavorful. Let your oregano grow in regular soil for a few weeks before picking for the best taste.
Also, remember that younger leaves are usually softer and more aromatic. Older, large leaves can sometimes be tougher and less fragrant. When in doubt, taste a leaf—if it smells and tastes strong, it’s a good candidate for drying.
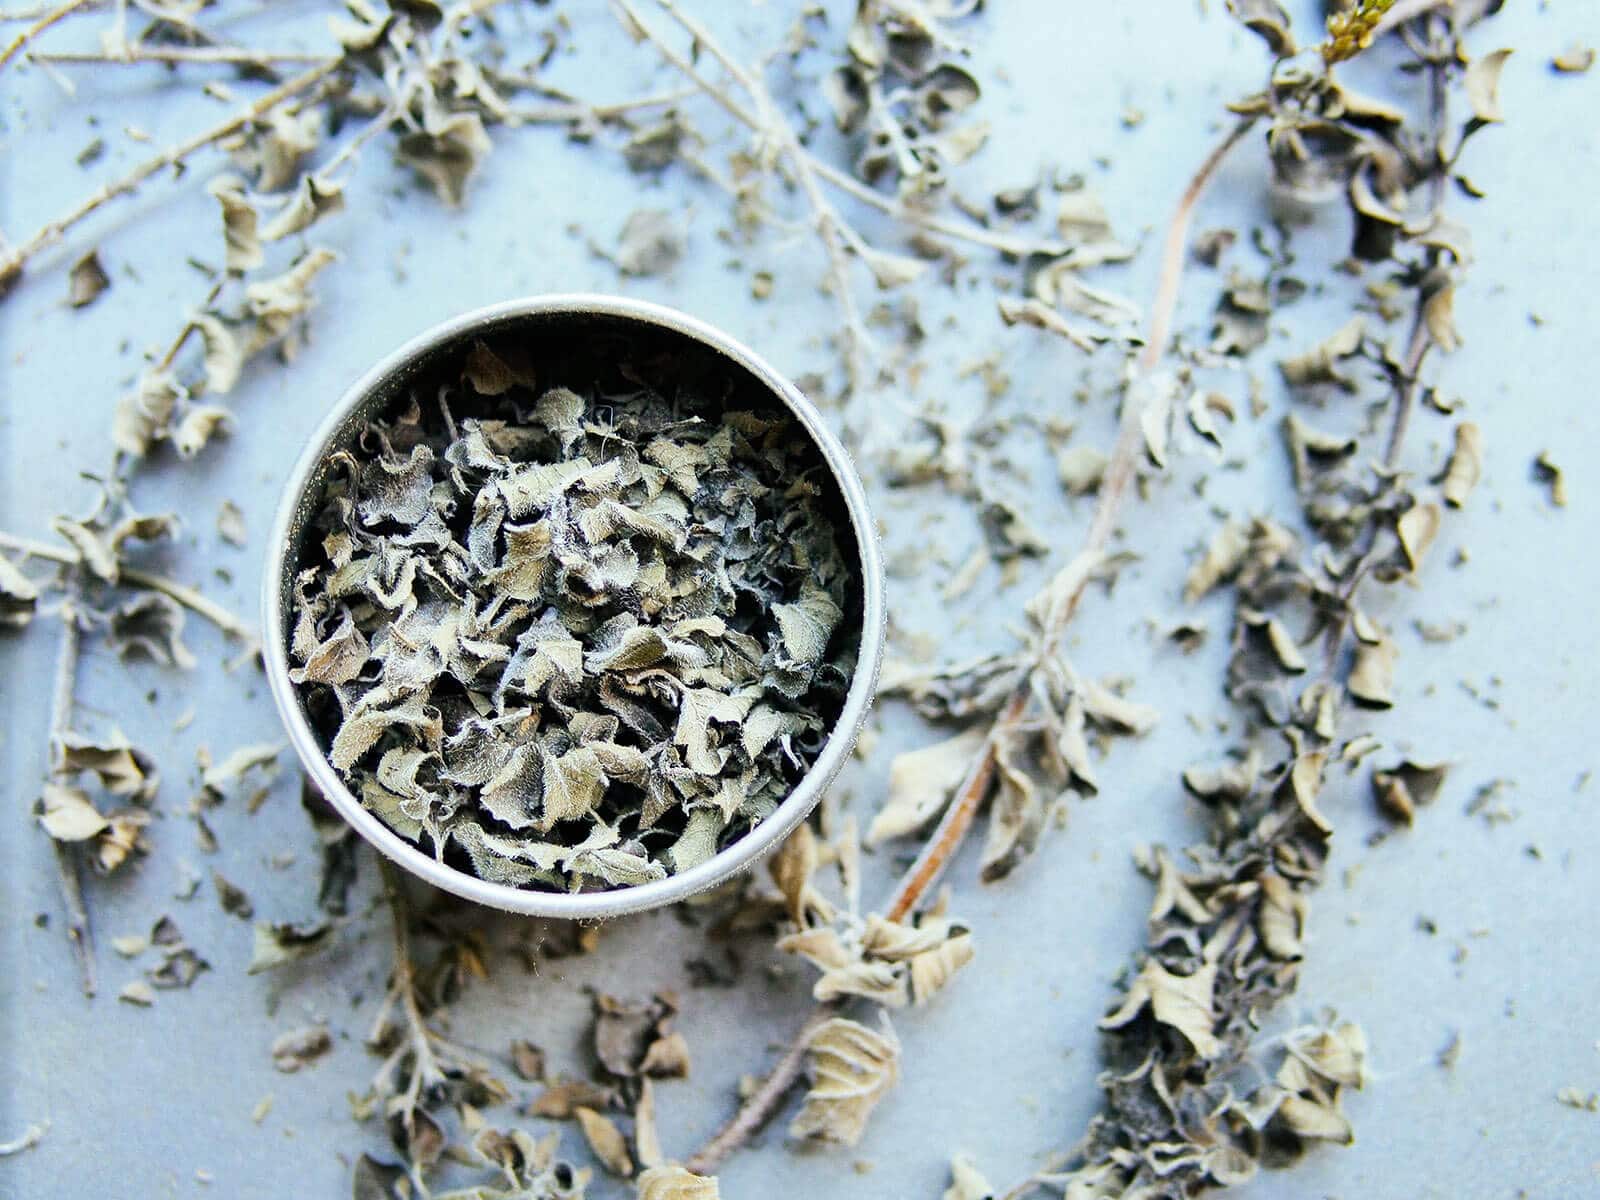
Credit: gardenbetty.com
When To Harvest Oregano For Drying
Timing is important. The best time to harvest oregano is in the morning, after the dew has dried but before the sun is hot. This is when the plant’s essential oils are at their highest.
Cut stems about 4 to 6 inches above the ground. Use sharp scissors or pruning shears to avoid damaging the plant. Don’t take more than one-third of the plant at a time, so it can regrow.
Another small but useful detail: Harvesting in the morning also means the leaves are less wilted from the heat of the day. This makes them easier to handle and less likely to bruise, which can affect flavor and drying.
If you accidentally wait until after flowering has started, you can still dry the leaves, but the flavor may be weaker and a bit more bitter. Some cooks save the flowering tops for making infused oils or vinegars, which adds a different character, but for classic dried oregano, stick with pre-flowering stems.
Preparing Oregano For Oven Drying
Cleanliness and preparation set the stage for success. Here’s how to get your oregano ready:
- Rinse gently: Wash oregano sprigs under cool water to remove dust or bugs.
- Shake off water: Gently shake the sprigs to remove excess water.
- Pat dry: Lay the sprigs on a towel and pat them dry. Excess water can cause steaming instead of drying in the oven.
- Remove thick stems: If stems are woody, strip the leaves. Tender stems can be left with the leaves for drying.
If you want whole dried leaves, keep them on the stem during drying. For crumbled oregano, you’ll remove the leaves after drying.
Here’s something most beginners miss: After washing, let the oregano air-dry for 30–60 minutes on a clean kitchen towel, if you have time. This extra step helps ensure no surface moisture remains, which is key for crisp, flavorful dried leaves.
If you’re in a hurry, you can use a salad spinner to remove more water before patting dry. This is especially useful if you’re drying a large batch at once.
Equipment Needed For Oven Drying
You don’t need special tools, but a few things help:
- Baking sheet: A rimmed sheet holds the oregano and keeps leaves from falling out.
- Parchment paper or a silicone mat: Protects the leaves and makes cleanup easier.
- Oven: Any standard oven works, but one with good temperature control is best.
- Cooling rack: Optional, but helps air circulate around the leaves.
If you have a convection oven, use the fan setting for faster, more even drying.
A less-known trick: If your oven tends to run hot, place an oven-safe thermometer on the rack to check the real temperature. Most ovens are not perfectly accurate at low temperatures, and just 10–20 degrees too hot can change your results.
For large batches, you can use two trays at once, but rotate them halfway through drying to ensure even heat exposure. Don’t forget to swap their positions top to bottom as well, as heat can be uneven.
Step-by-step Guide: How To Dry Oregano In The Oven
Follow these steps for perfect results:
- Preheat your oven: Set the oven to the lowest possible temperature, usually between 170°F and 200°F (75°C to 93°C). Lower is better to preserve flavor.
- Arrange oregano on the tray: Spread sprigs or leaves in a single layer on the baking sheet lined with parchment paper. Avoid overlapping.
- Place in the oven: Put the tray on the middle rack. Prop the oven door open slightly with a wooden spoon to let moisture escape.
- Drying time: Bake for 30 minutes, then check the oregano. Total drying time is usually 45 minutes to 1 hour, but can vary depending on moisture and oven.
- Check for doneness: Leaves should crumble easily between your fingers and feel dry—not soft or leathery.
- Cool and store: Let the oregano cool on the tray. Strip the leaves from the stems, if needed.
Example: Drying Oregano In A Regular Kitchen Oven
Suppose you have two cups of fresh oregano sprigs. After washing and drying, you preheat your oven to 175°F. Spread the sprigs on a baking sheet lined with parchment. Bake for 45 minutes, checking every 15 minutes. When the leaves are crisp, cool them and store in an airtight jar.
One detail that can make a difference: If your oven door doesn’t stay slightly open, wedge a folded piece of foil or a heatproof silicone pad in the door. This simple step allows moisture to escape and prevents soggy or steamed leaves.
Also, after cooling, test a couple of leaves. If they still bend or feel soft, return them to the oven for 5–10 more minutes. Always err on the side of slightly under-drying, as you can add time, but burnt oregano cannot be fixed.
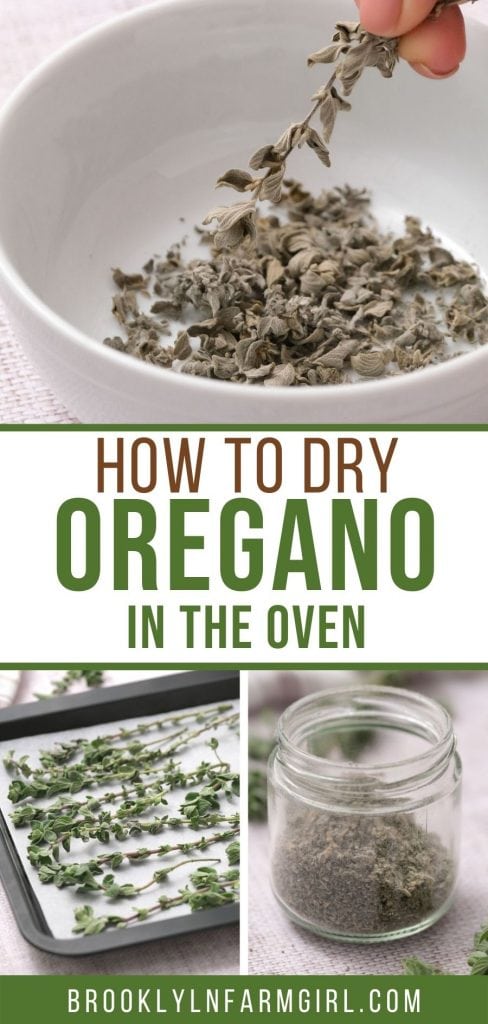
Credit: brooklynfarmgirl.com
Oven Drying Vs Other Methods
Many people wonder if oven drying is the best way, or if air drying or using a dehydrator is better. Let’s compare:
| Method | Time Needed | Flavor Quality | Effort | Risks |
|---|---|---|---|---|
| Oven Drying | 45-60 min | Excellent, strong | Low | Can burn if overheated |
| Air Drying | 1-2 weeks | Very good | Low | Mold if humidity is high |
| Dehydrator | 1-3 hours | Excellent | Low-medium | Requires special device |
| Microwave | 2-3 min | Fair, can scorch | Very low | Flavor loss, uneven drying |
Oven drying gives you a balance between speed and quality. It’s also accessible, since almost every home has an oven.
A non-obvious insight: If you want to try air drying, bundle oregano sprigs with string and hang them upside down in a dry, well-ventilated room. But never try this in a humid or damp basement—mold can grow inside the bundle, ruining the batch.
For those who dry large amounts of herbs, a dehydrator is a good investment, but for most home cooks, the oven is a perfect compromise.
Tips For Best Results
Drying oregano in the oven is simple, but a few expert tips will help you get the most out of your effort.
- Don’t use high heat: Temperatures over 200°F can burn the leaves and destroy flavor.
- Use the fan setting: If your oven has a convection feature, use it to help moisture escape.
- Check frequently: Ovens vary. Start checking at the 30-minute mark to avoid over-drying.
- Dry in small batches: Overcrowding leads to uneven drying.
- Store quickly: Once cooled, put the oregano in a jar right away to avoid absorbing moisture from the air.
A non-obvious insight: If your kitchen is humid, run the oven a few minutes empty before drying. This removes moisture and speeds up the process.
Another useful tip: If you have a lot of oregano, dry it in multiple sessions instead of crowding the tray. This gives each leaf enough space for air circulation and results in better color and flavor.
Also, don’t be afraid to taste test a leaf once it’s cooled. This is the best way to judge if your batch is ready to store.

Credit: brooklynfarmgirl.com
Common Mistakes And How To Avoid Them
Even experienced cooks can make errors when drying herbs. Here’s what to watch for:
- Overlapping leaves: This causes uneven drying and can leave some parts damp.
- Not removing moisture: Wet leaves will steam, not dry. Always pat oregano dry before starting.
- Using too much heat: High heat destroys essential oils, leaving flavorless oregano.
- Storing before cooling: Warm oregano in a closed jar can create condensation, leading to mold.
Another mistake is not labeling the storage jar. Dried oregano looks similar to other herbs, and without a label, you might confuse it later.
Some beginners also forget to check for hidden moisture in thick stems. If you dry whole sprigs, always snap a stem to see if it breaks easily. If it bends, it’s not fully dry and can cause spoilage in storage.
If you’re in a hurry, resist the temptation to turn up the heat. It’s better to be patient and get a batch with maximum aroma and taste.
How To Store Oven-dried Oregano
Proper storage makes a big difference in shelf life and flavor.
- Use airtight containers: Glass jars with tight lids work best.
- Keep away from light and heat: Store jars in a cool, dark pantry or cupboard.
- Label with date: Write the drying date on the jar, so you know when it’s time to use or replace.
Oven-dried oregano can last up to a year with good storage. After that, it’s still safe but will lose strength.
Comparison: Fresh Vs Oven-dried Oregano Shelf Life
| Form | Storage Method | Shelf Life | Flavor Quality |
|---|---|---|---|
| Fresh Oregano | Fridge, in water | 5-7 days | Excellent |
| Oven-Dried Oregano | Airtight jar, dark place | 6-12 months | Very good |
| Store-Bought Dried | Airtight jar, dark place | 1-2 years | Good to fair |
If you want to extend shelf life, store dried oregano as whole leaves and only crumble them when you need to use them. Crushing releases the oils and aroma, so doing this just before cooking means more flavor in your dishes.
How To Use Oven-dried Oregano
Oven-dried oregano is versatile and can be used in almost any savory dish. Its flavor is more concentrated than fresh, so adjust the quantity in recipes.
- Pizza and pasta sauces: Add a pinch for classic Italian flavor.
- Meat rubs and marinades: Oregano pairs well with chicken, beef, and lamb.
- Salad dressings: Mix with oil and vinegar for a Mediterranean taste.
- Roasted vegetables: Sprinkle on potatoes, zucchini, or peppers before roasting.
If you’re replacing fresh oregano with dried, use about one-third the amount. For example, if a recipe calls for 1 tablespoon fresh, use 1 teaspoon dried.
A non-obvious way to use dried oregano: Add it to homemade bread dough or sprinkle on focaccia before baking. The slow bake releases the oils for a wonderful aroma.
You can also infuse dried oregano in olive oil for a homemade flavored oil—just place a few teaspoons in a bottle of oil and let it sit for a few days. Use this oil for salad dressings, dipping, or brushing on grilled meats.
How To Test For Quality And Flavor
After drying, you want to be sure your oregano is top quality. Here’s how:
- Crumble a leaf: It should break easily and feel dry.
- Smell the aroma: Good dried oregano smells strong and earthy. Weak aroma means too much heat or age.
- Taste test: Crush a little between your fingers and taste. It should be bold and slightly peppery.
If the flavor is weak, your oven may have been too hot, or the oregano was old before drying.
To test for long-term quality, store a small sample and compare the aroma every couple of months. This helps you learn how quickly your dried herbs lose potency, so you can adjust your storage or drying method next time.
Maximizing Flavor: Advanced Tips
There are a few advanced tricks that most beginners miss:
- Harvest at peak oil time: Just before flowering, when buds are visible but not open, is peak flavor.
- Dry leaves whole: Only crumble when ready to use. Whole leaves protect the oils longer.
- Store with a silica packet: If your area is humid, a food-safe silica packet in the jar keeps oregano dry.
A less-known tip: Combine oven drying with a quick air dry (1-2 hours on a towel before oven) for even better results.
Another advanced tip: If you like a smokier flavor, try placing a small pan of wood chips in the bottom of the oven while drying. Just a little smoke can add a unique twist to your oregano, great for grilling or barbecue dishes.
For the best results, avoid grinding oregano into a fine powder. Large flakes or whole leaves keep more aroma and are less likely to lose oils during storage.
Troubleshooting: Problems And Solutions
Sometimes things don’t go as planned. Here’s how to fix common issues:
- Leaves turn brown: Oven was too hot. Lower the temperature next time.
- Musty smell: Oregano wasn’t fully dry before storing. Discard and try again with smaller batches.
- Flavorless oregano: Old leaves, or dried too long. Use fresher oregano and check more often during drying.
If you see any mold in storage, discard the batch and clean the jar before reusing.
Another problem: If your dried oregano absorbs odors from the kitchen, store the jar away from strong-smelling foods like coffee or spices. Glass jars with rubber gaskets are best for blocking outside smells.
Safety And Nutrition
Dried oregano is safe for most people, but a few safety tips are important:
- Don’t eat if moldy: Mold can produce toxins. Always check for moisture or bad smell.
- Pregnant women: Large amounts of oregano oil are not recommended. Cooking use is safe.
- Nutrient retention: Drying preserves most antioxidants and vitamins, but not all. Oven drying at low heat keeps more nutrients than high heat.
Oregano is rich in vitamin K, antioxidants, and has antimicrobial properties. For more on oregano’s health benefits, visit the WebMD page on oregano.
A practical safety tip: If you have allergies to mint or basil, test oregano carefully the first time you use it, as they are related plants.
Environmental And Cost Benefits
Drying your own oregano is not just about flavor. It’s also better for the environment and your wallet.
- Reduces waste: No plastic packaging or long transport.
- Saves money: Fresh oregano is cheap in season; dried herbs are expensive to buy.
- Supports local gardens: Growing and drying your own encourages local, sustainable food.
A typical fresh oregano bunch costs $2-3. After drying, you get the same amount as a $6-8 store-bought jar.
Over time, you also reduce food waste. Instead of letting leftover fresh oregano wilt in your fridge, you preserve it for months. This is especially helpful if you grow oregano at home and have a big harvest.
Frequently Asked Questions
How Do I Know When Oregano Is Fully Dry In The Oven?
Dried oregano leaves should feel crisp and crumble easily between your fingers. If they still feel soft or bend, bake for another 5-10 minutes, checking often. Fully dry leaves will also have a strong aroma when crushed.
Can I Dry Other Herbs In The Oven The Same Way?
Yes, the oven drying method works for many herbs like thyme, rosemary, sage, and mint. Adjust the drying time for thin or delicate herbs—mint dries faster, while rosemary may take a bit longer. Always use the lowest oven setting.
Is Oven-dried Oregano Stronger Than Fresh?
Yes, oven-dried oregano is more concentrated. Use about one-third the amount compared to fresh. For example, use 1 teaspoon dried for every tablespoon fresh in a recipe.
How Long Does Oven-dried Oregano Last?
When stored in an airtight container in a cool, dark place, oven-dried oregano stays fresh for 6 to 12 months. Over time, the flavor will fade, but it is still safe to use if it smells and tastes good.
What If I Don’t Have Parchment Paper For The Tray?
You can use a silicone baking mat or a sheet of aluminum foil with small holes poked in it. Avoid using wax paper, as it’s not oven-safe. If using just the tray, check often to prevent sticking.
Drying oregano in the oven is a simple, rewarding process that gives you a flavorful, aromatic herb for your kitchen. With the right steps and tips, you’ll enjoy better taste and save money—all with a few sprigs and a bit of time.